Module Installation Guide
This guide explains different methods to install modules in the system.
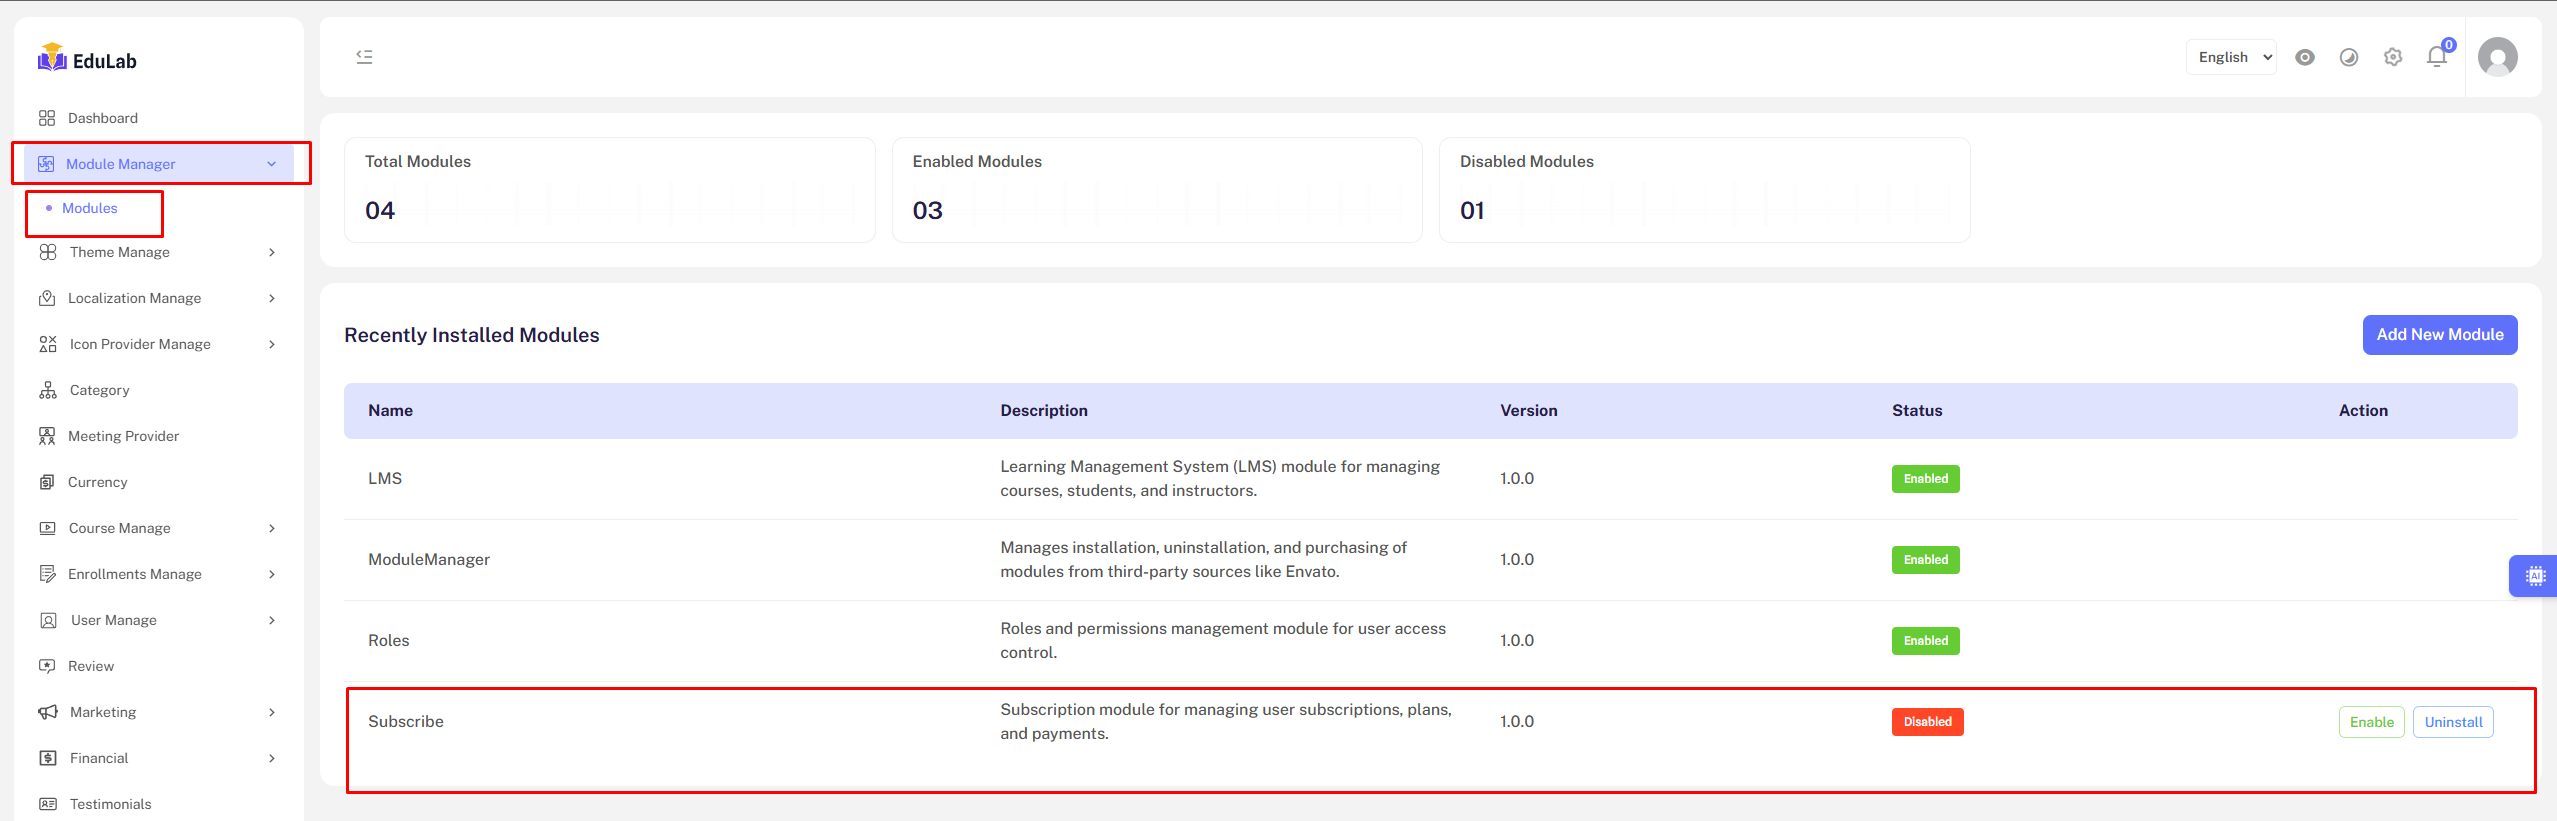
Method 1: Using Module Manager (Recommended)
Step 1: Access Module Manager
Navigate to your dashboard or admin panel and go to Module Manager > Modules.
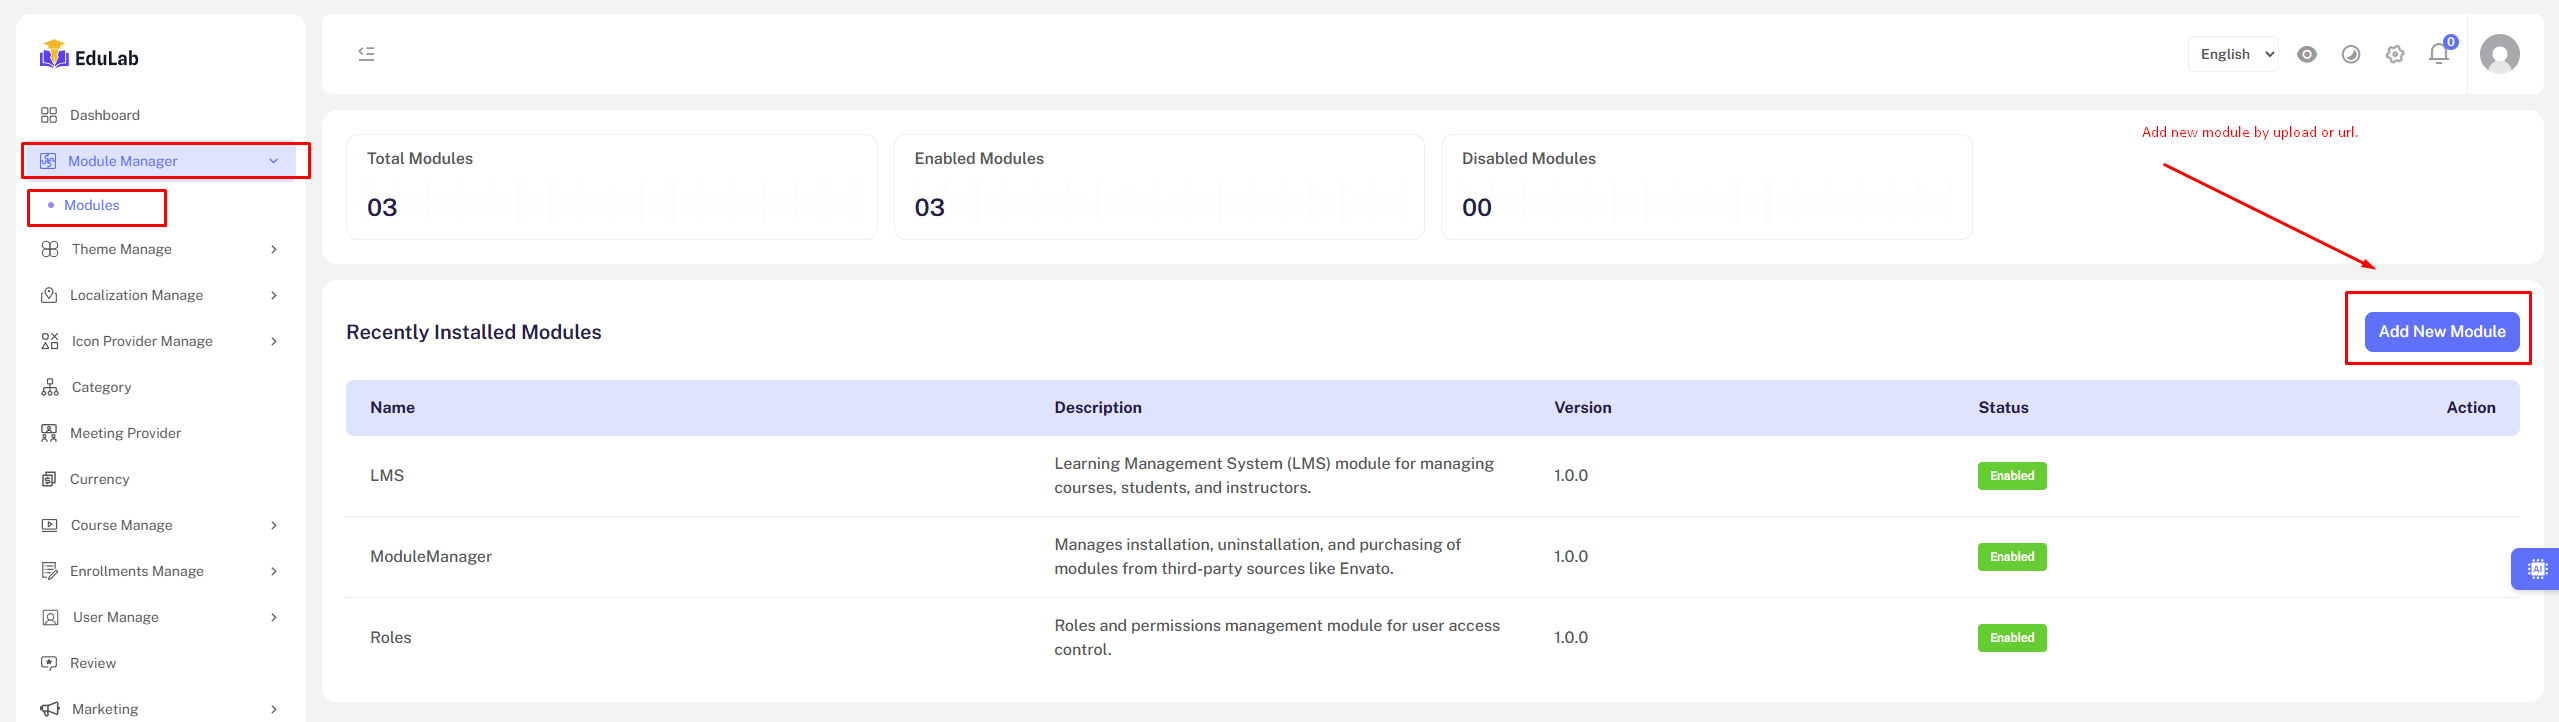
Step 2: Add New Module
Click on the Add New Module button.
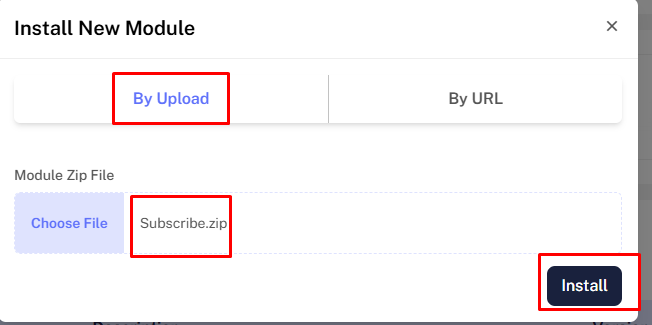
A popup will appear with two installation options:
- Upload local file
- Add by URL
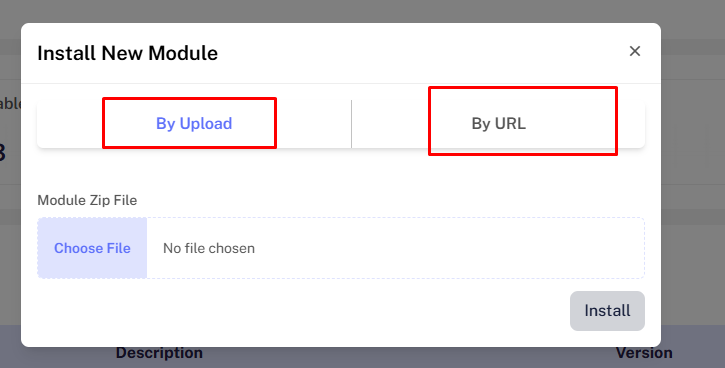
Step 3: Choose Installation Method
Option A: Upload Zip File
- Select your module zip file from your computer
- Upload it through the interface
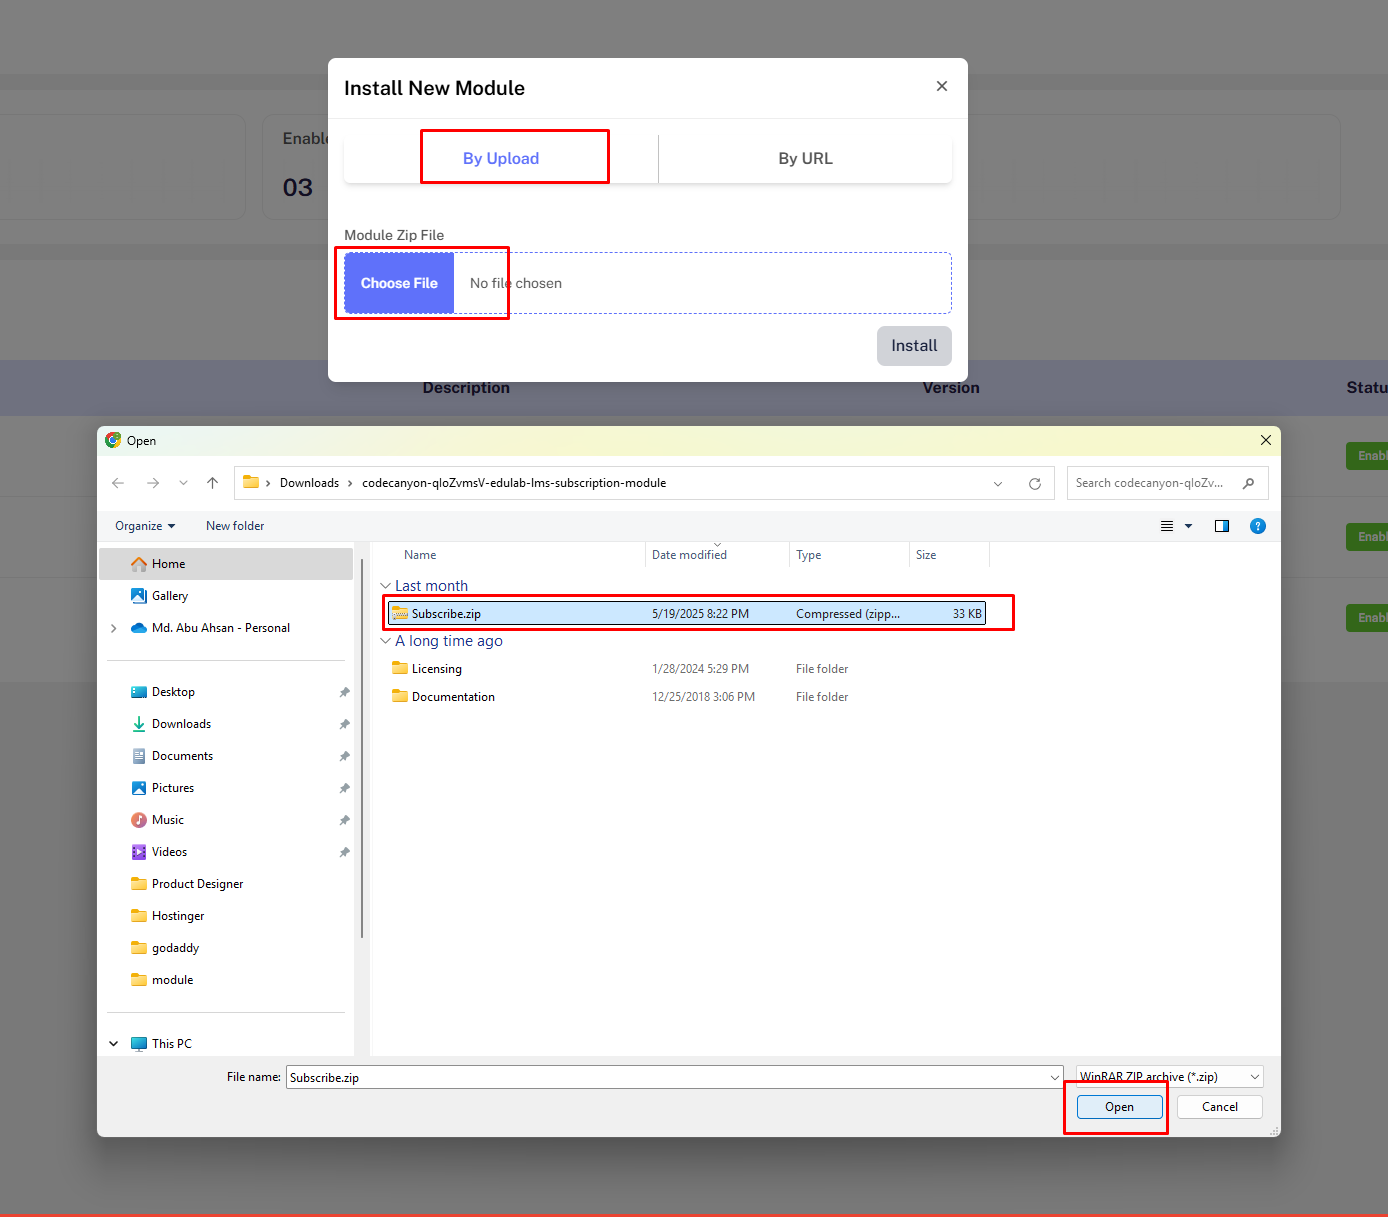
- Click the
Installbutton to complete the installation
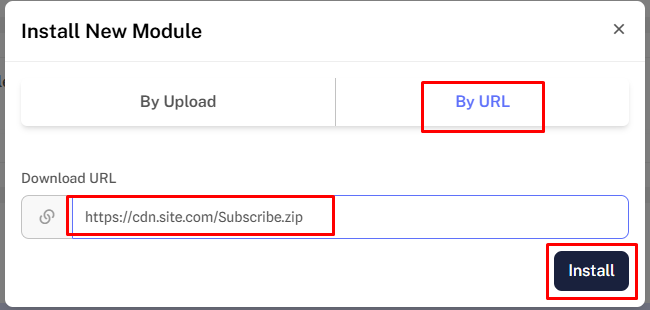
Option B: Install via URL
If your module is hosted on a third-party server, you can install it using the URL option.
Step 4: Enable the Module
After installation, you'll see the module listed. Click the "Enable" button to activate it.
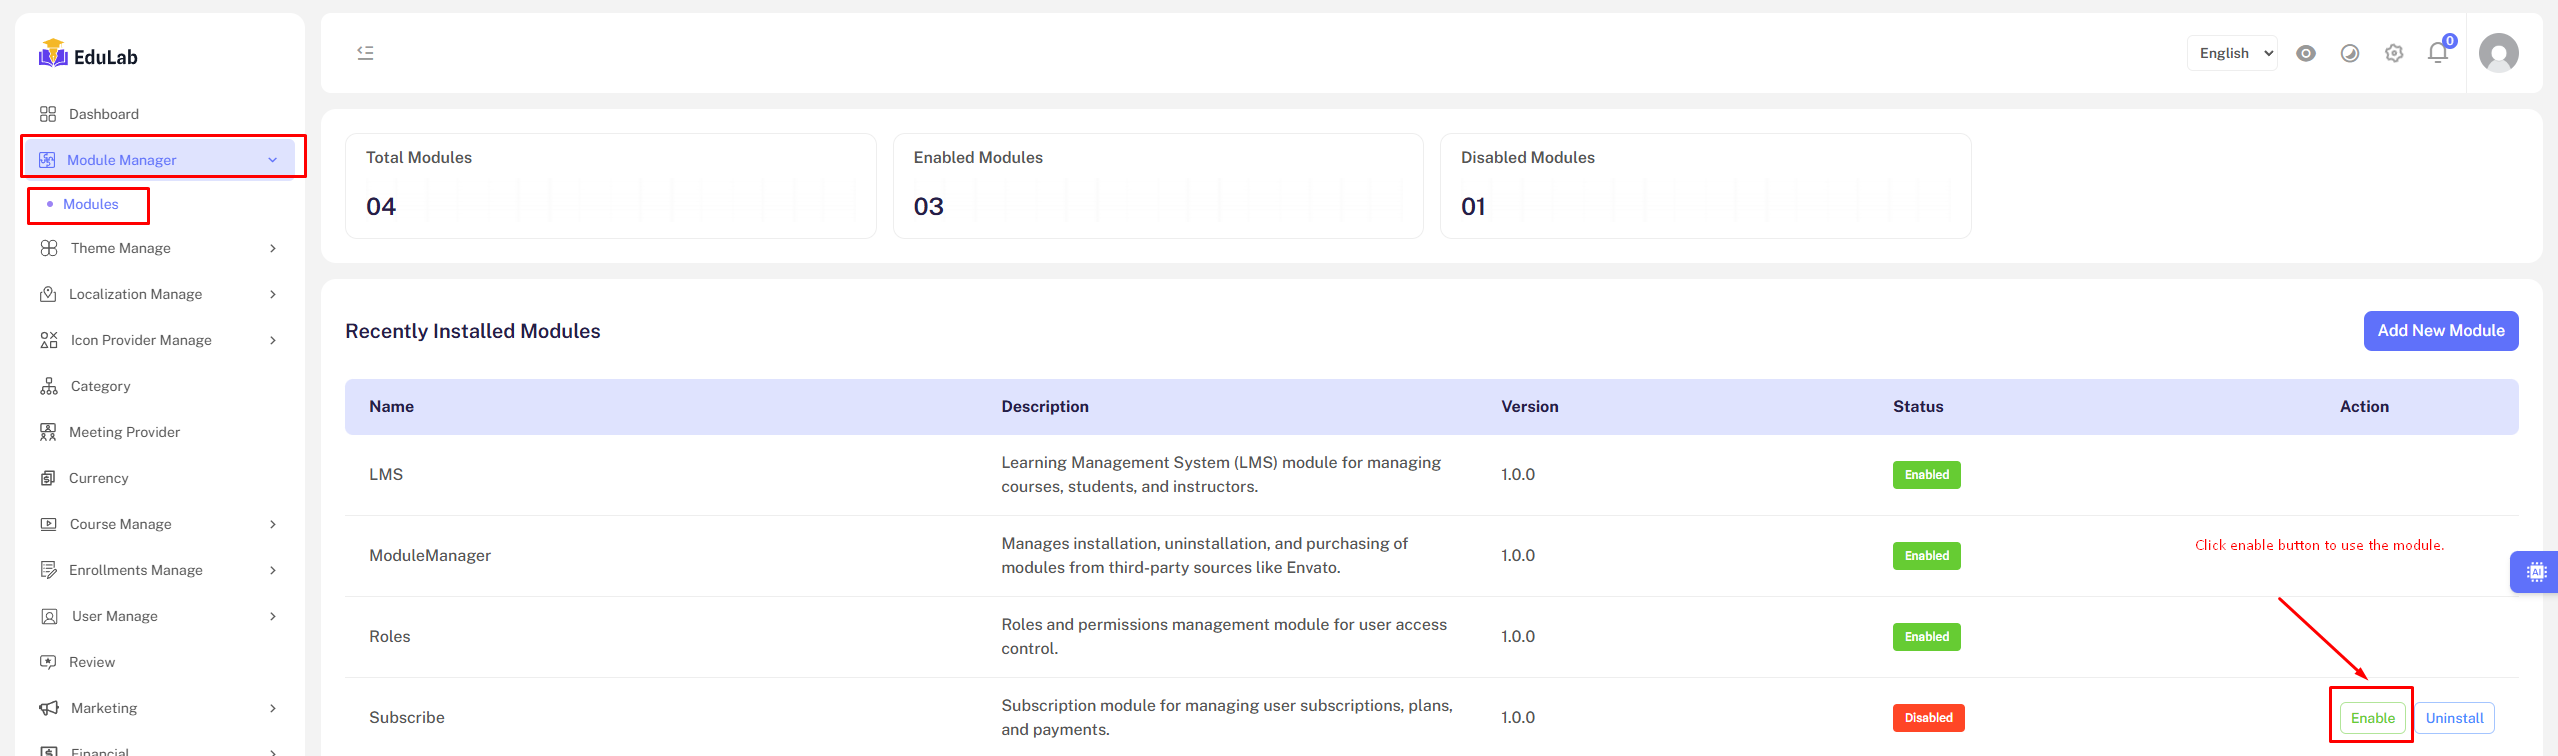
Note: If the "Enable" button doesn't appear, it means the module is a core component essential for the system to function properly.
Method 2: Manual Installation
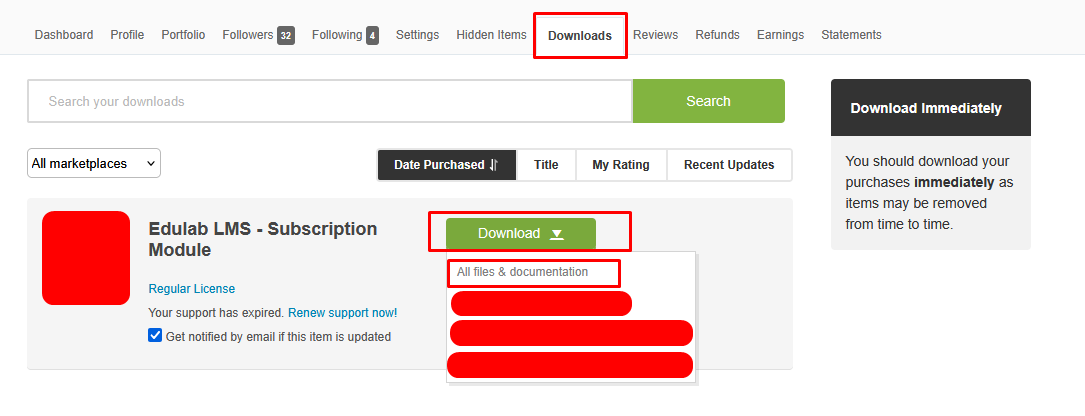
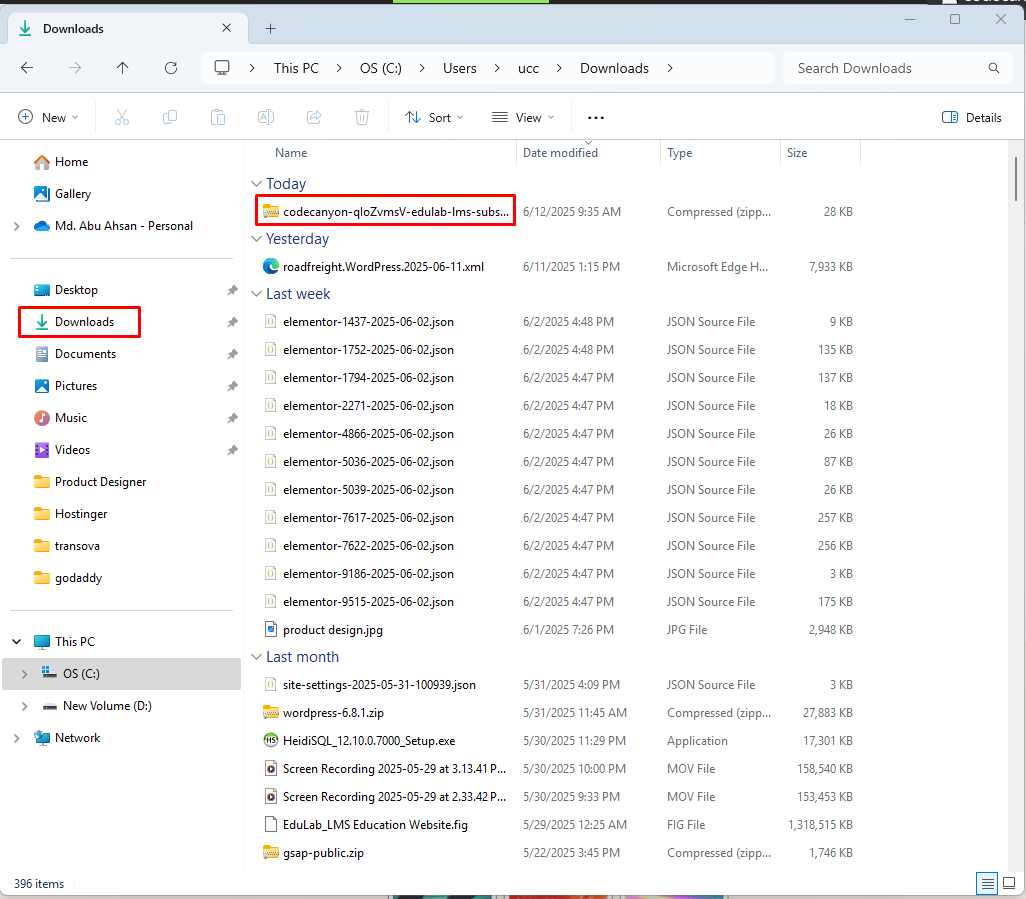
Step 1: Download the Module
Purchase and download the module zip file.
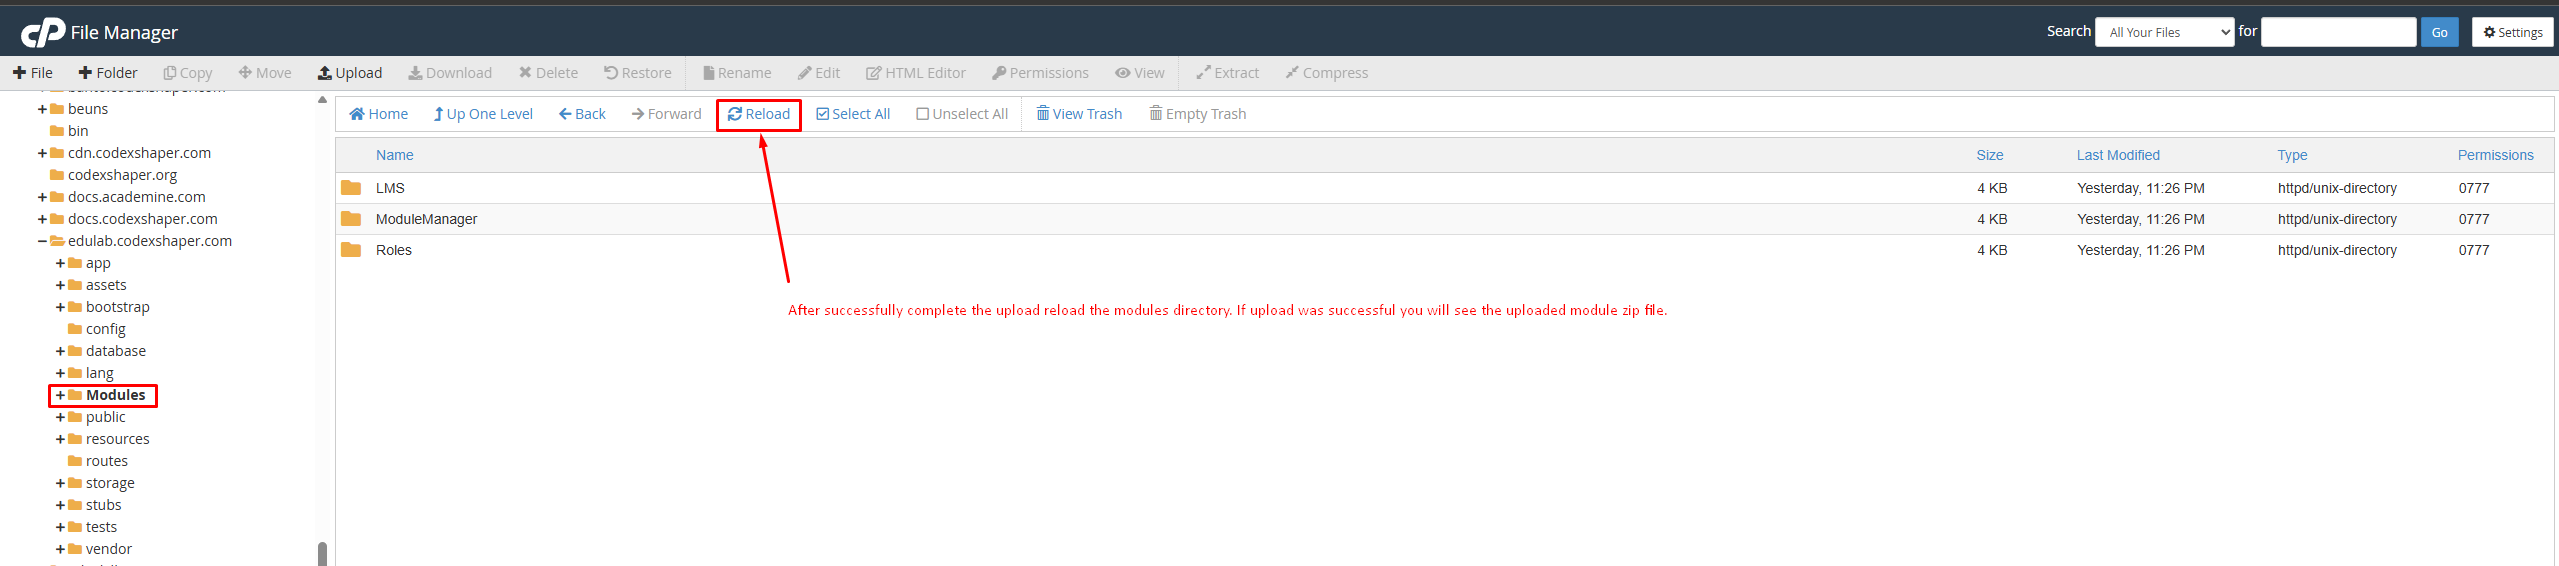
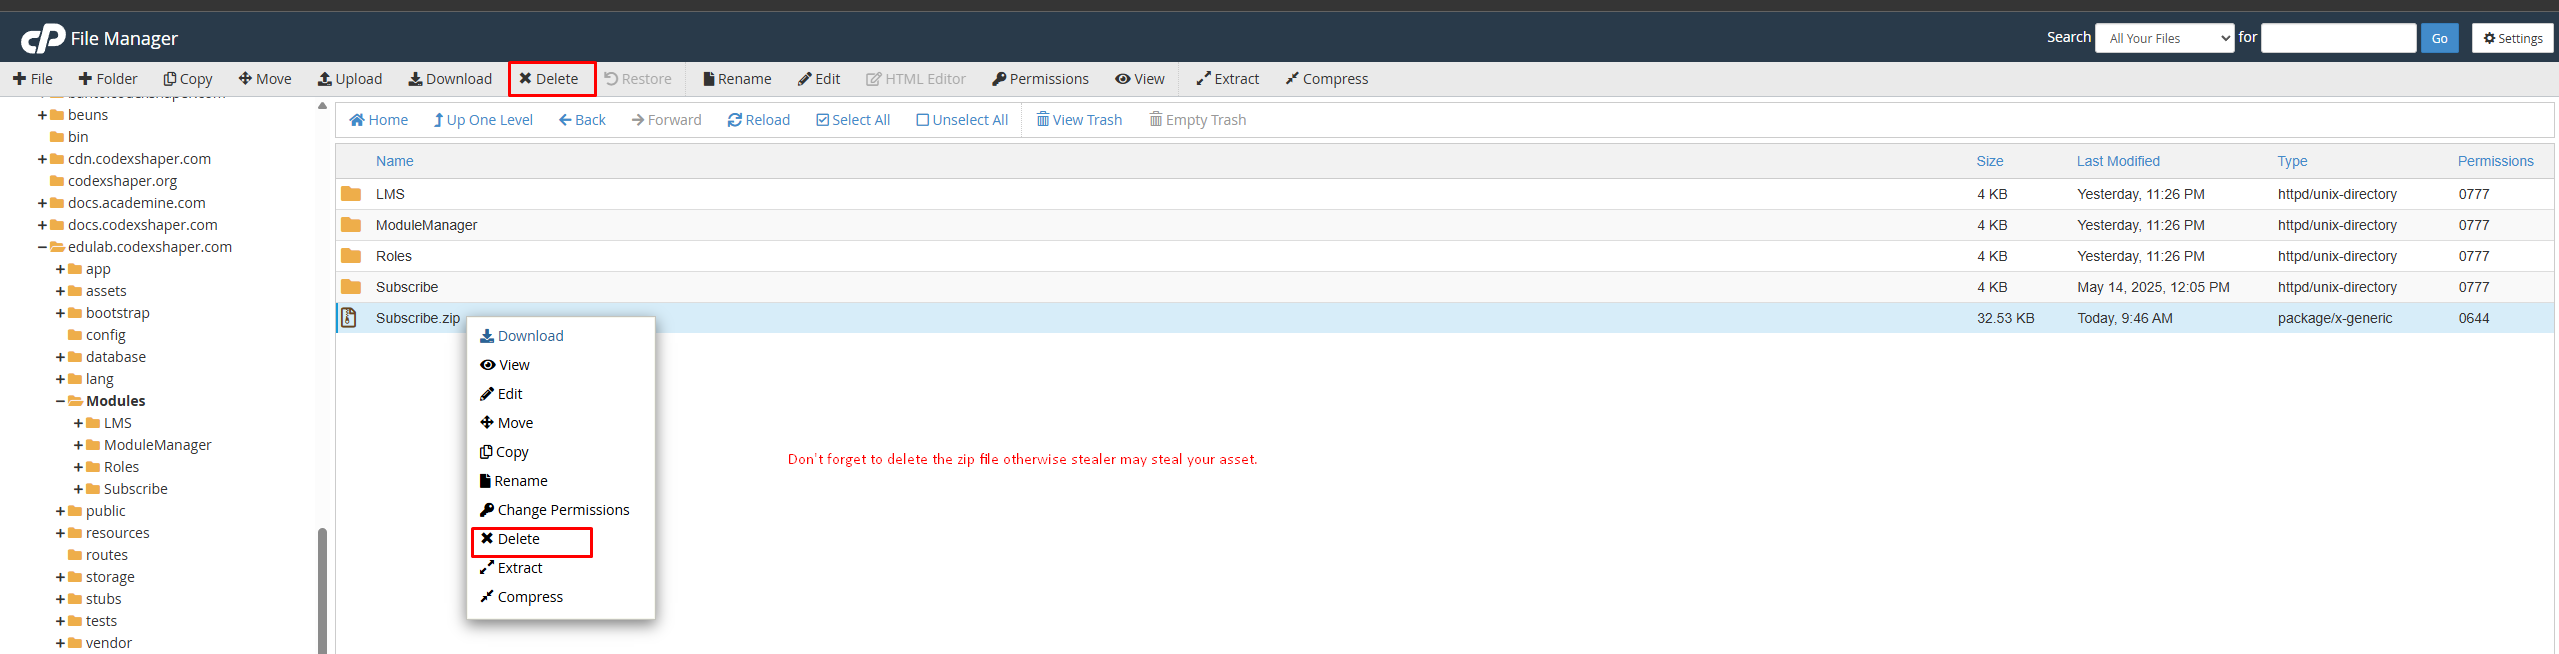
Step 2: Upload and Extract the Module
- Navigate to the
Modulesdirectory in your installation:/path/to/root/Modules/
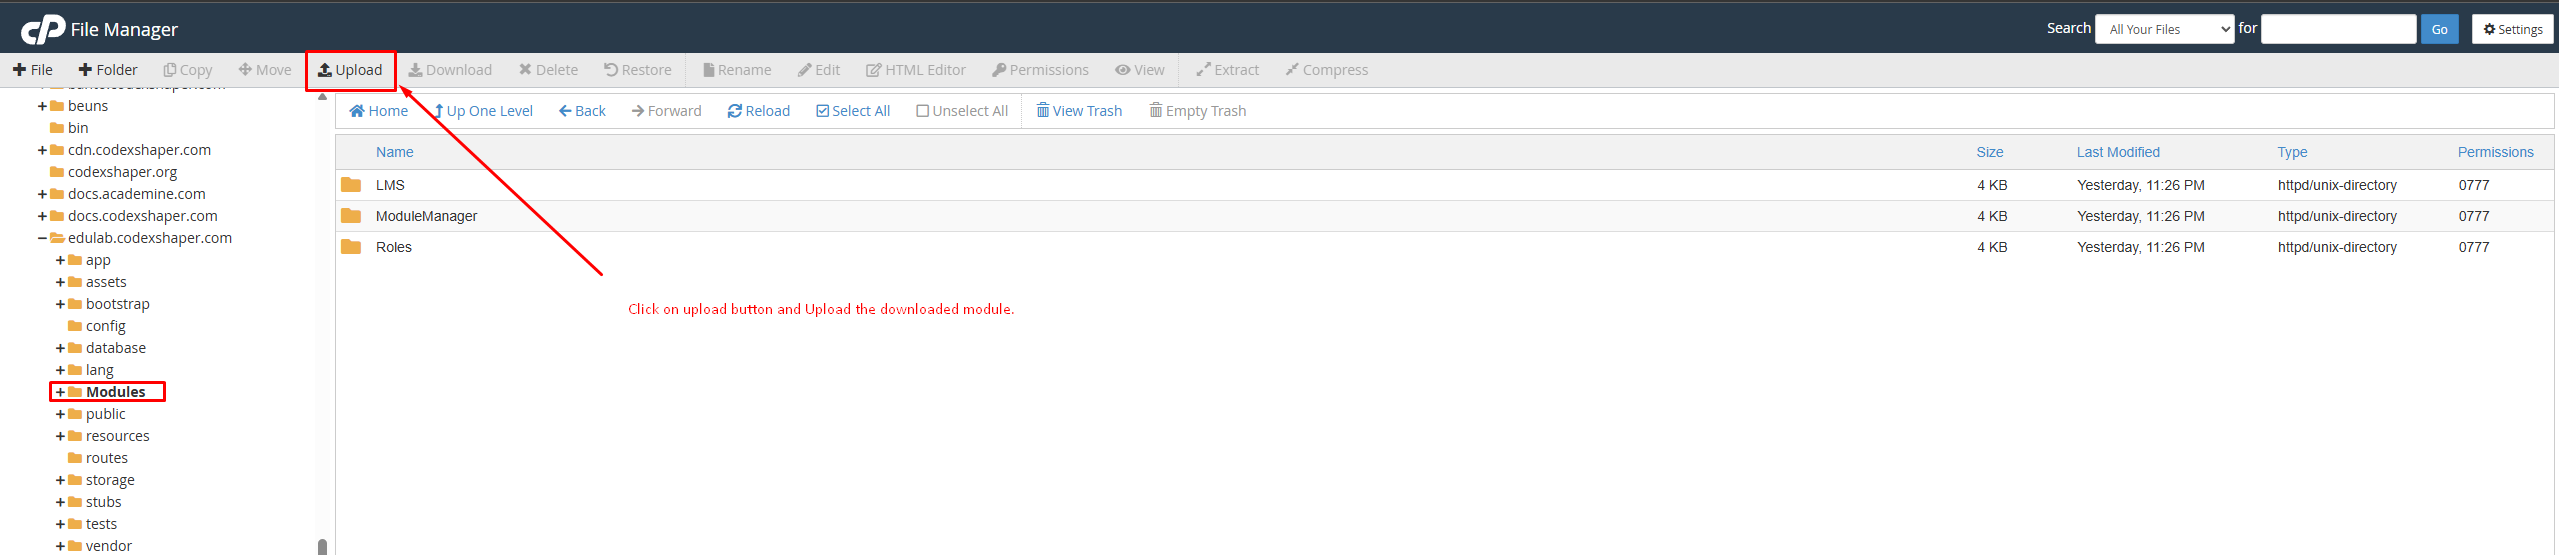
- Click the
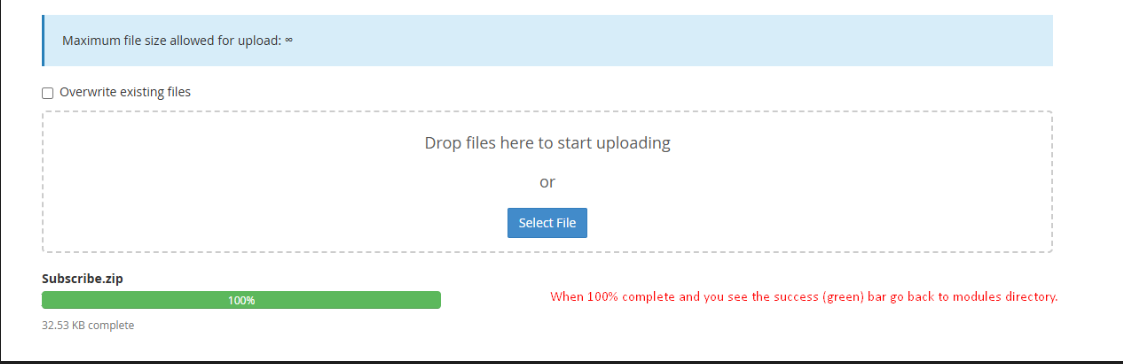
Uploadbutton and upload your module zip file
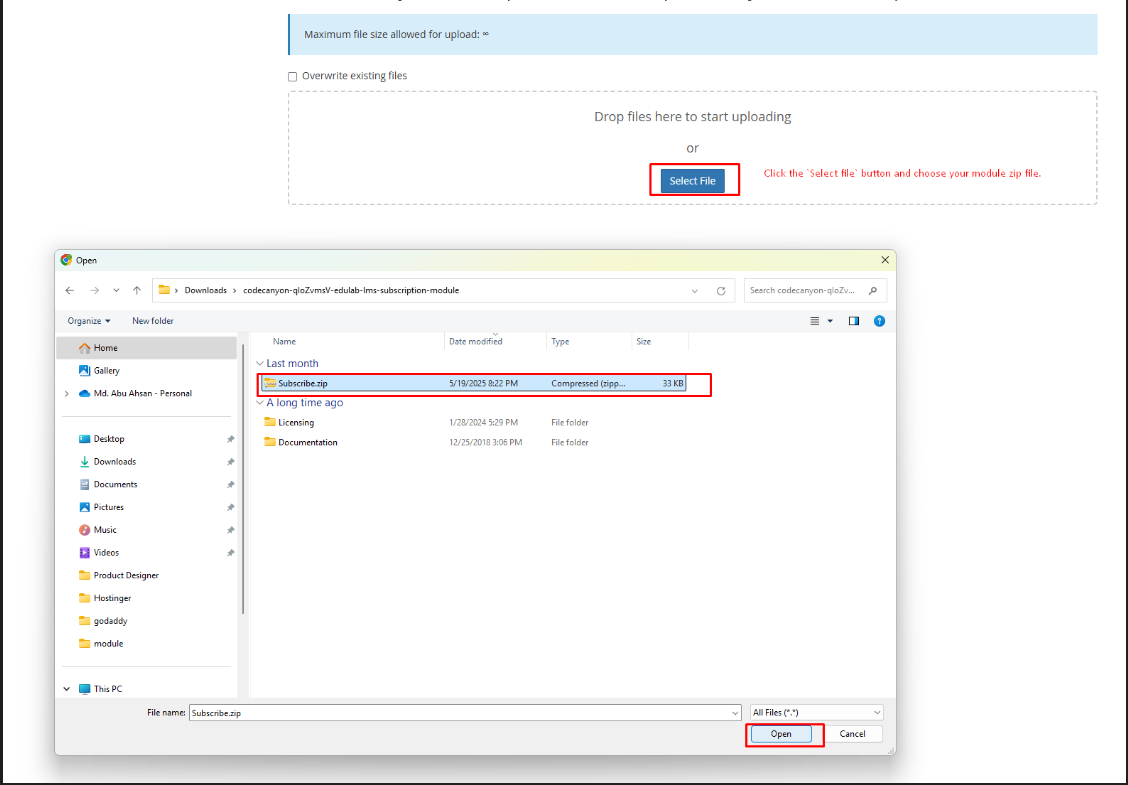
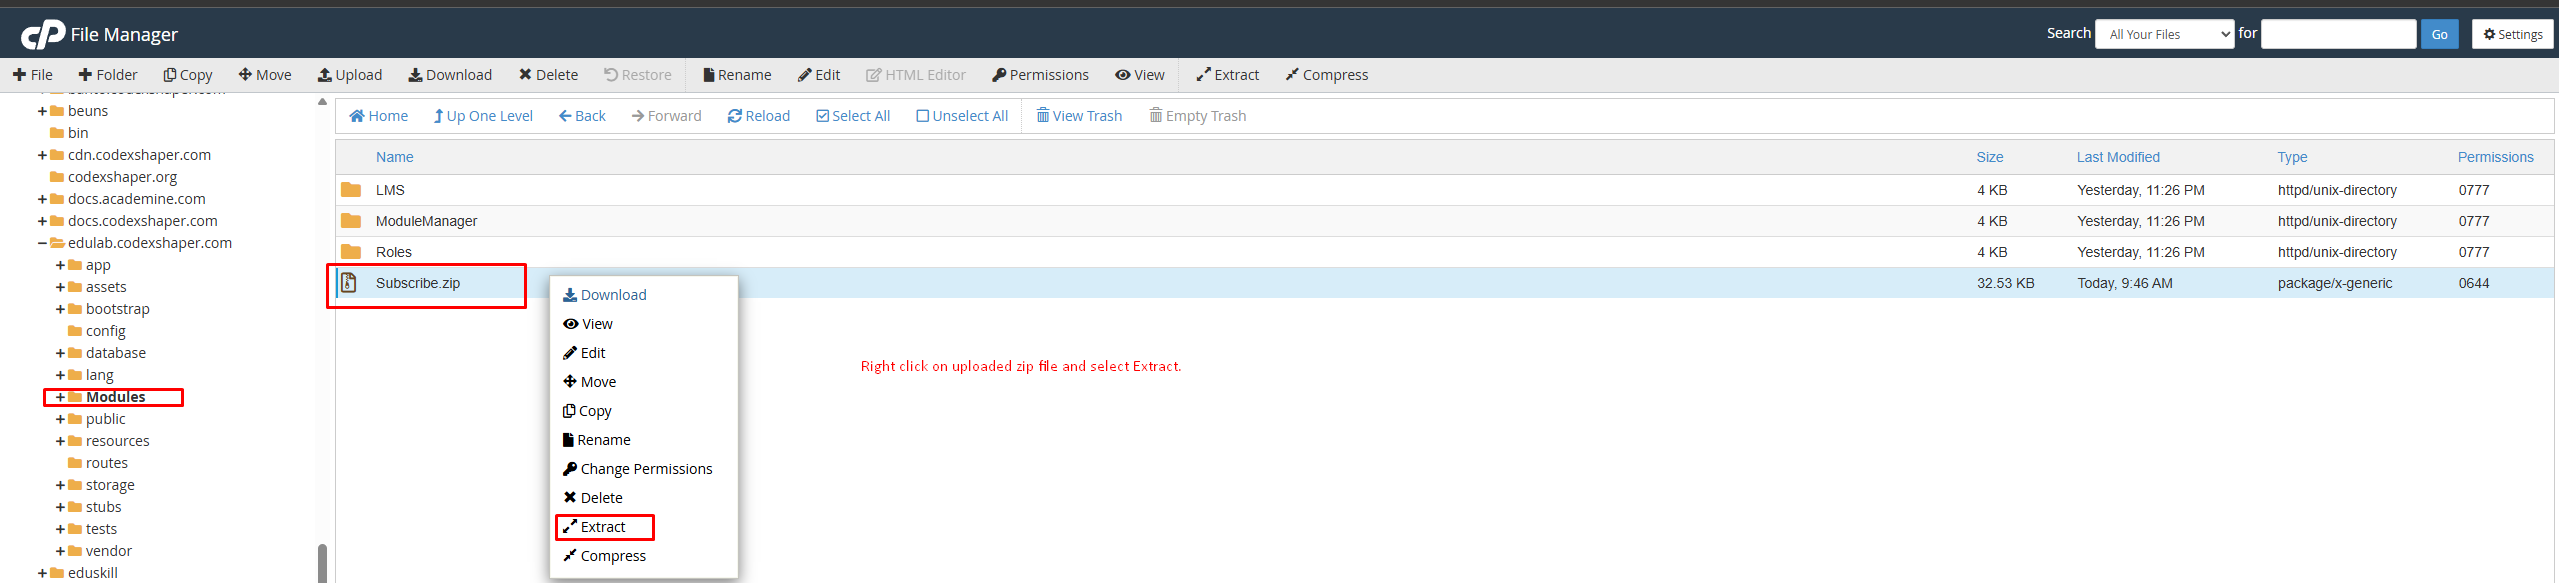
- After successful upload, close the window and return to the module directory
- Extract the zip file
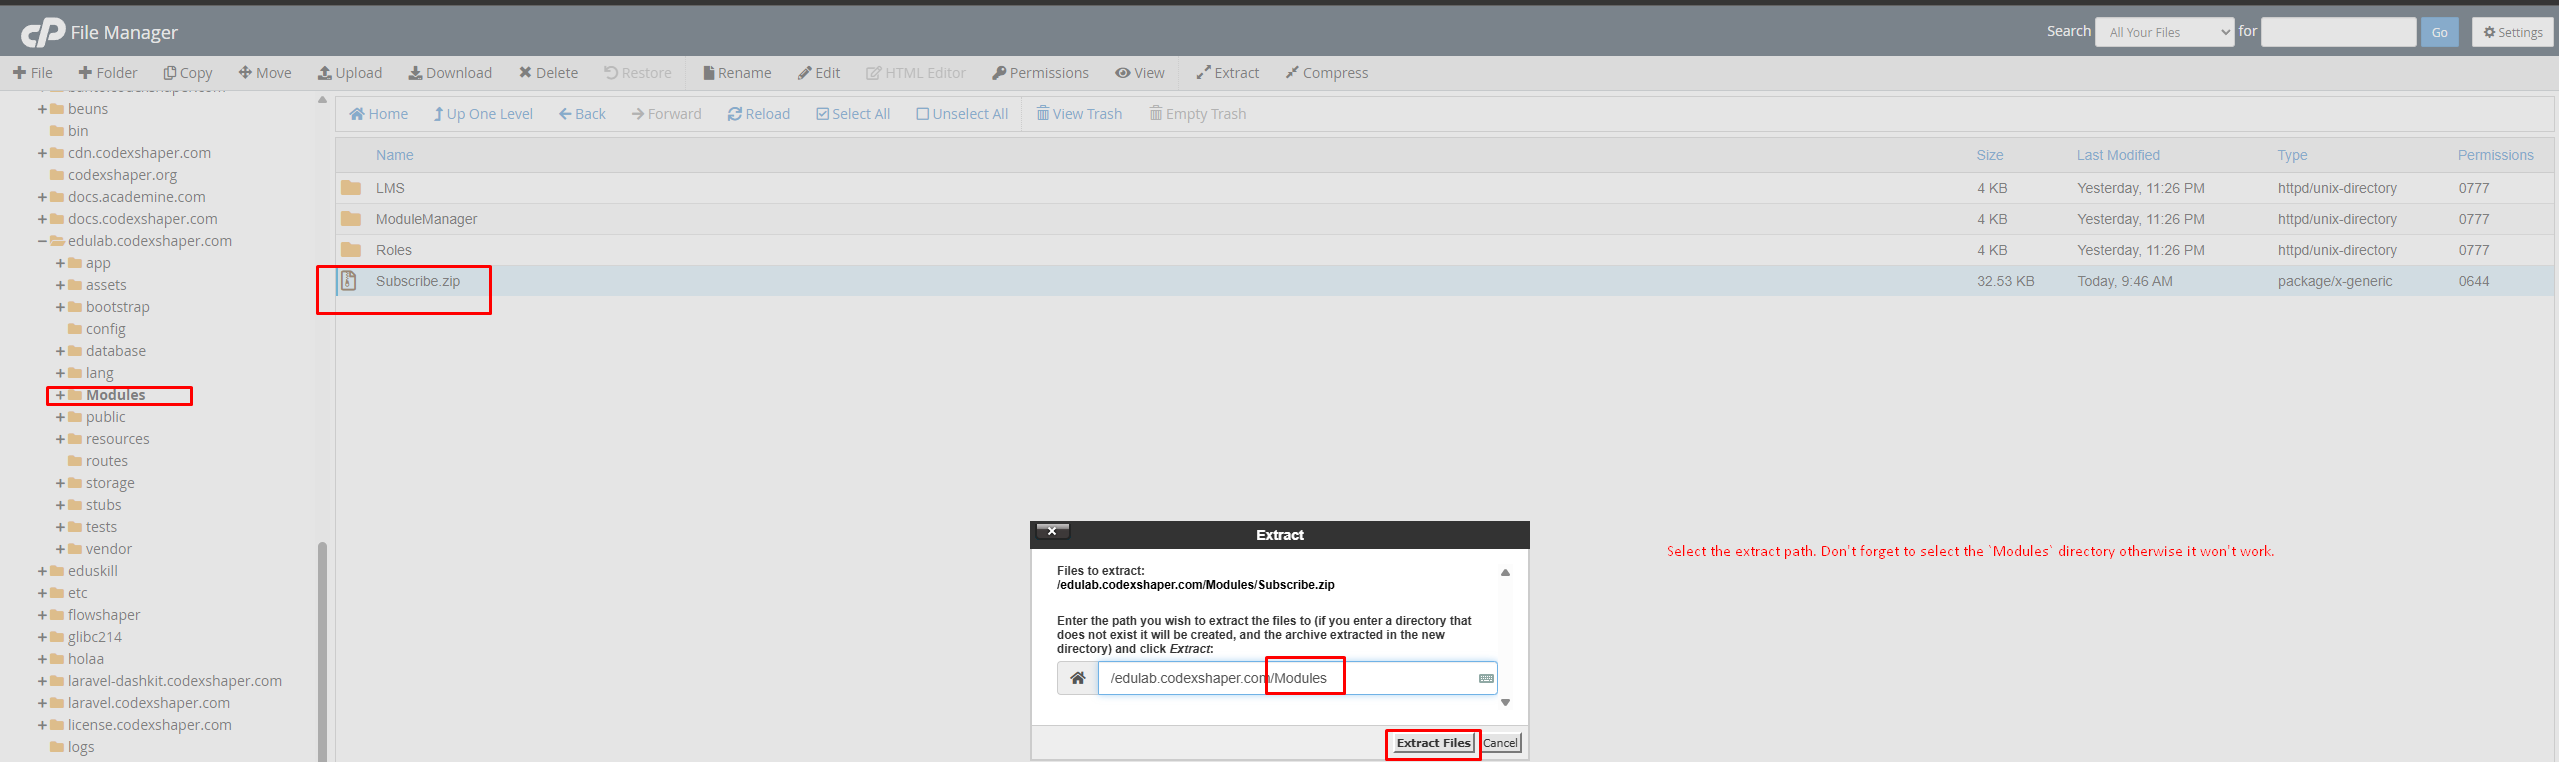
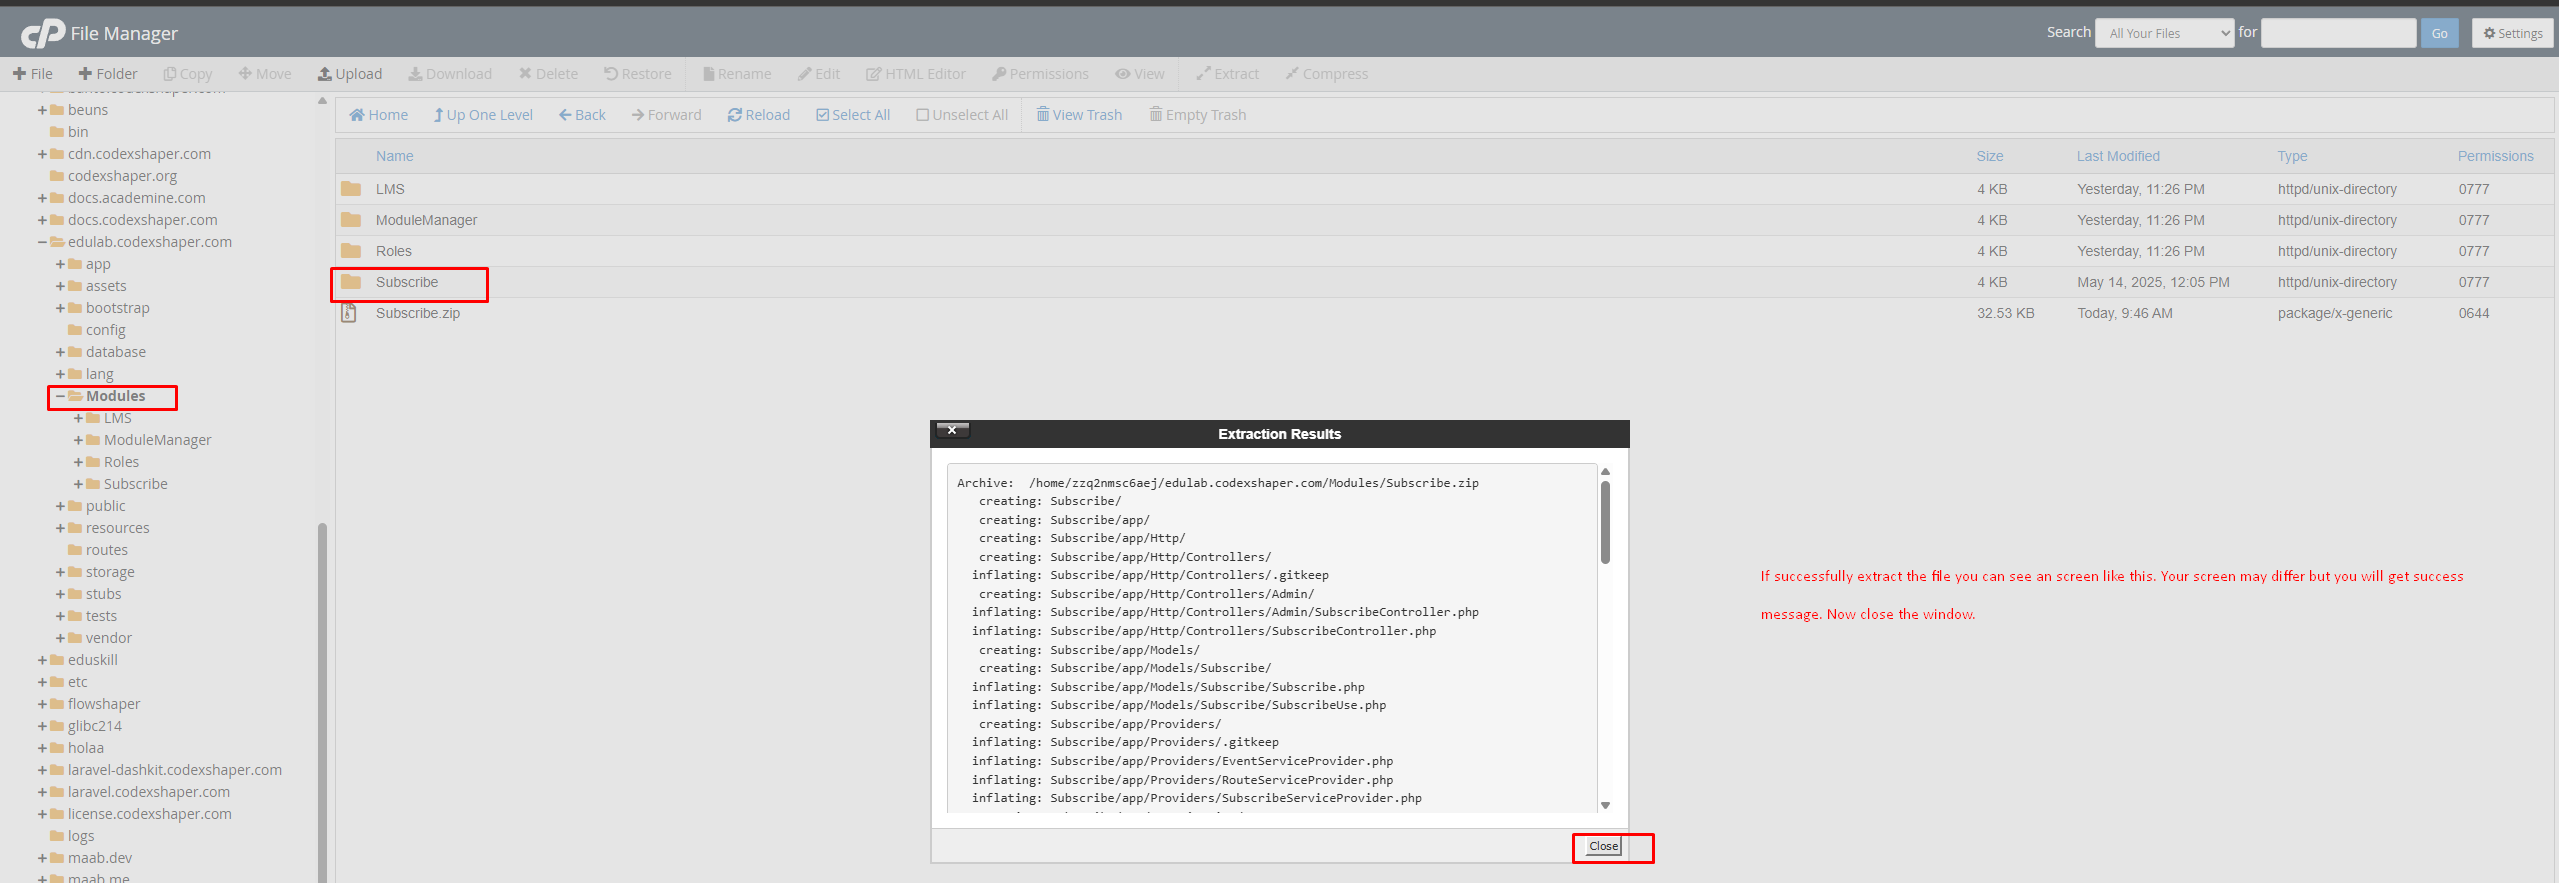
- Important: Delete the uploaded zip file for security
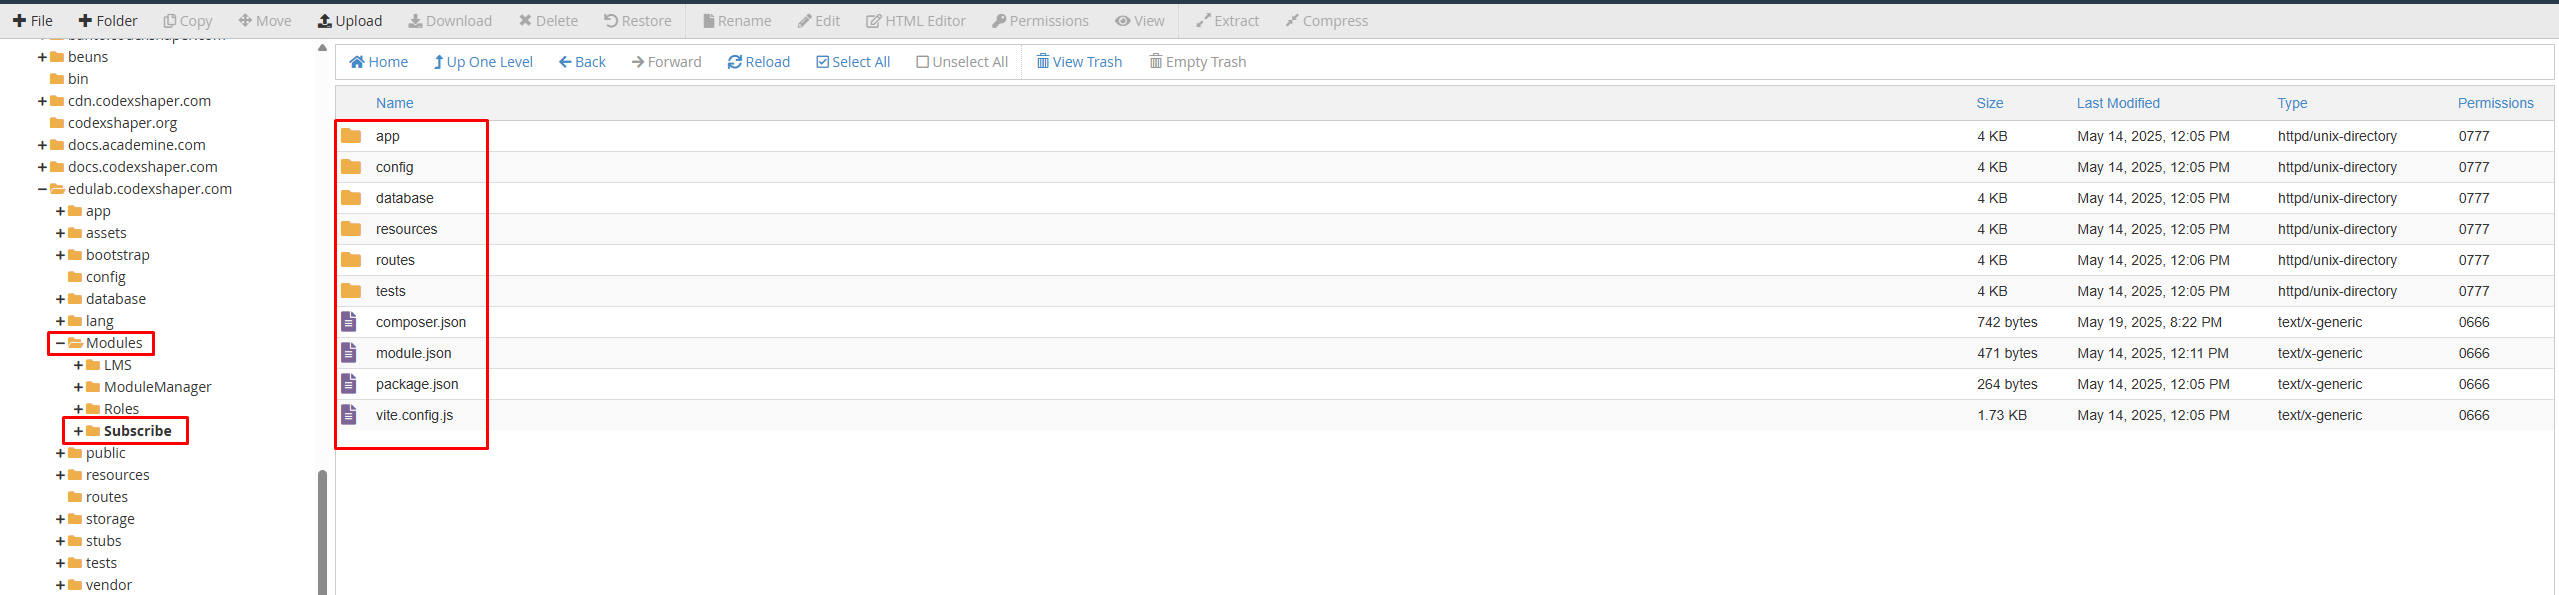
Step 3: Verify Folder Structure
Ensure there is no extra parent folder after extraction. Your module folder structure should look like:
ModuleName (parent folder)
   - app
   - config
   - database
   - resources
   - routes
   - ...
Step 4: Enable via Module Manager
- Go to your admin panel and select
Module Manager >> Modules
- Find your module in the list and click the "Enable" button
Step 5: Migration
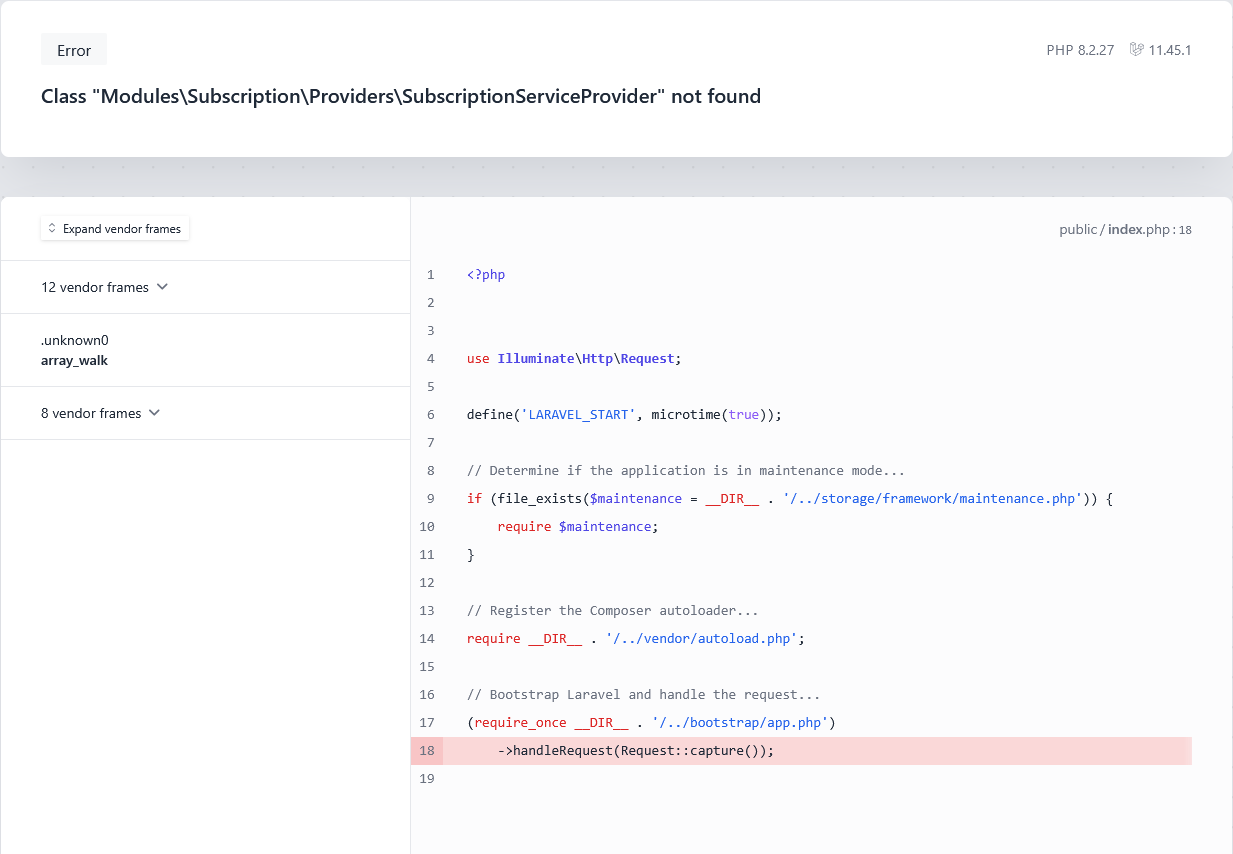
php artisan module:migrate {name}Updating Composer After Installation
After installing a module, you must update Composer for the system to recognize it. If you see an error like Class "Modules\Subscription\Providers\SubscriptionServiceProvider" not found, follow these steps:
Option 1: Manual Composer Update
Go to your project root directory and run:
composer update
Option 2: Composer Dump Autoload
If your hosting has disabled composer update, try:
composer dump-autoload
Note: If both commands are unavailable, contact your hosting provider to enable Composer functionality.
Automating Composer Updates
To handle composer updates automatically, you can use the queue system:
Option 1: Manual Queue Processing
Run the following command via SSH:
php artisan queue:workThis will process any pending jobs, including composer updates. However, this command stops when your SSH session expires.
Option 2: Cron Job (Recommended)
Set up a cron job to run the queue automatically.
Refer to the Cron Jobs documentation for instructions on setting up cron jobs in cPanel and hPanel.
Important: Ensure you have sufficient permissions to run Composer commands on your server.