Installing the Subscription Module
Thank you for purchasing the Subscription module! Follow the steps below to install and manage the module on your system.
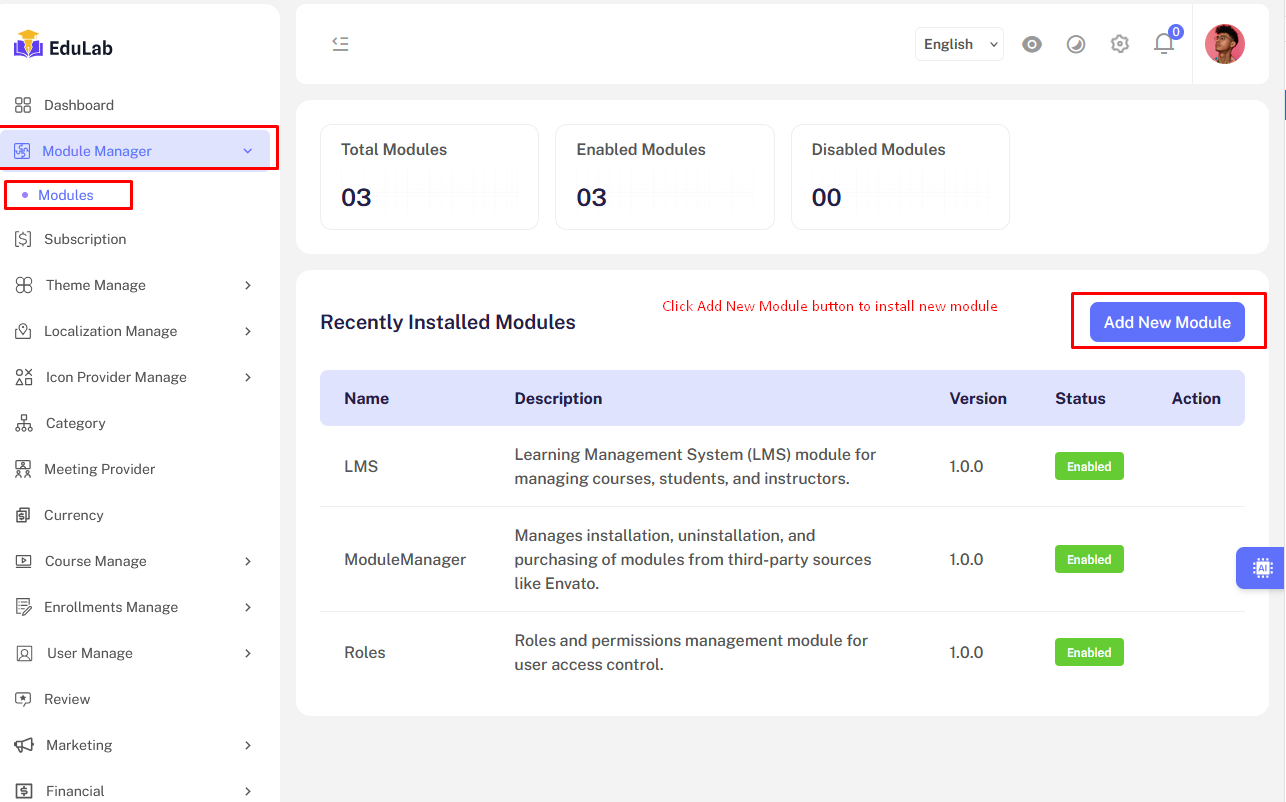
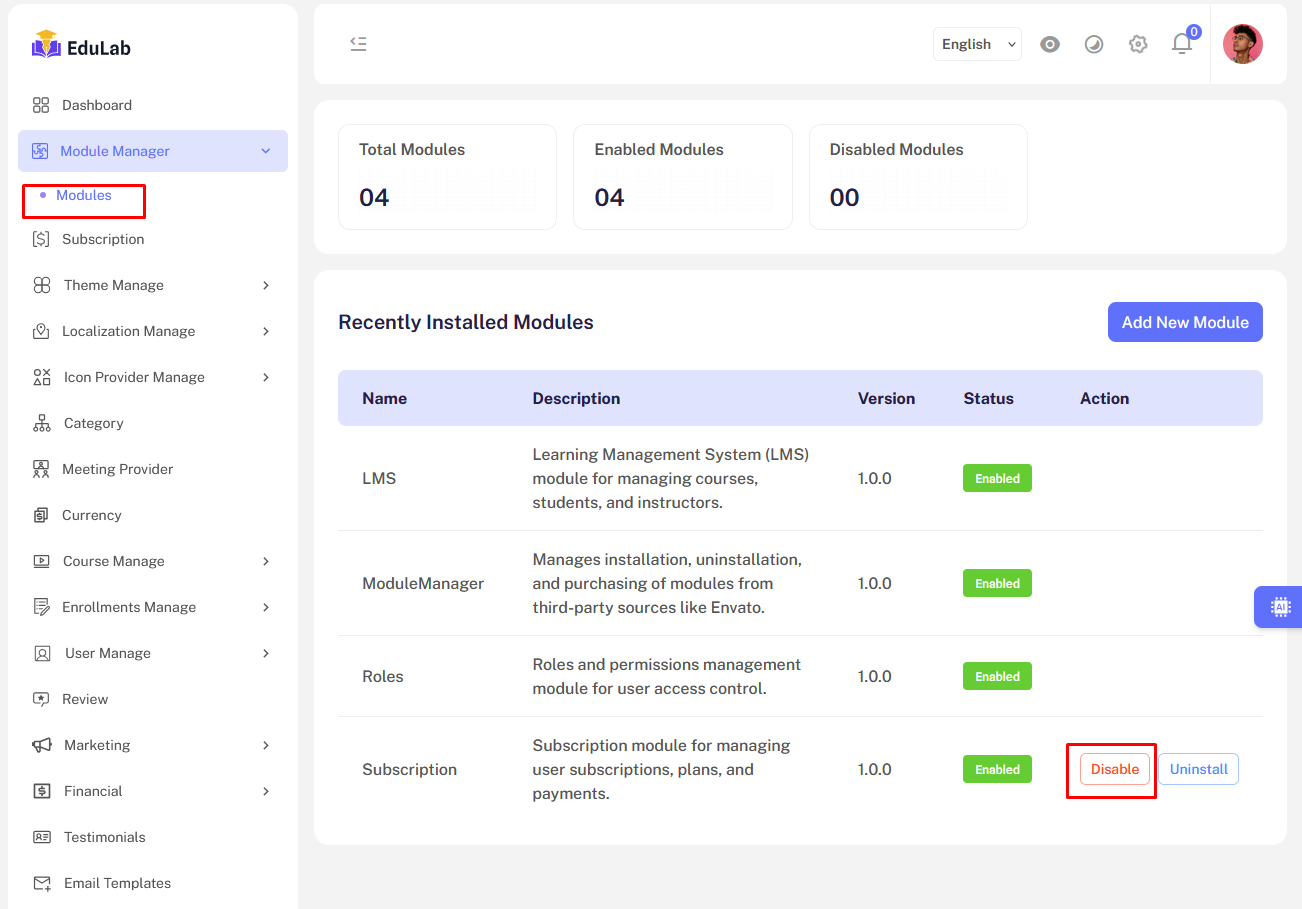
Step 1: Open Module Manager
Navigate to Module Manager > Modules in your admin dashboard and click the Add New Module button.
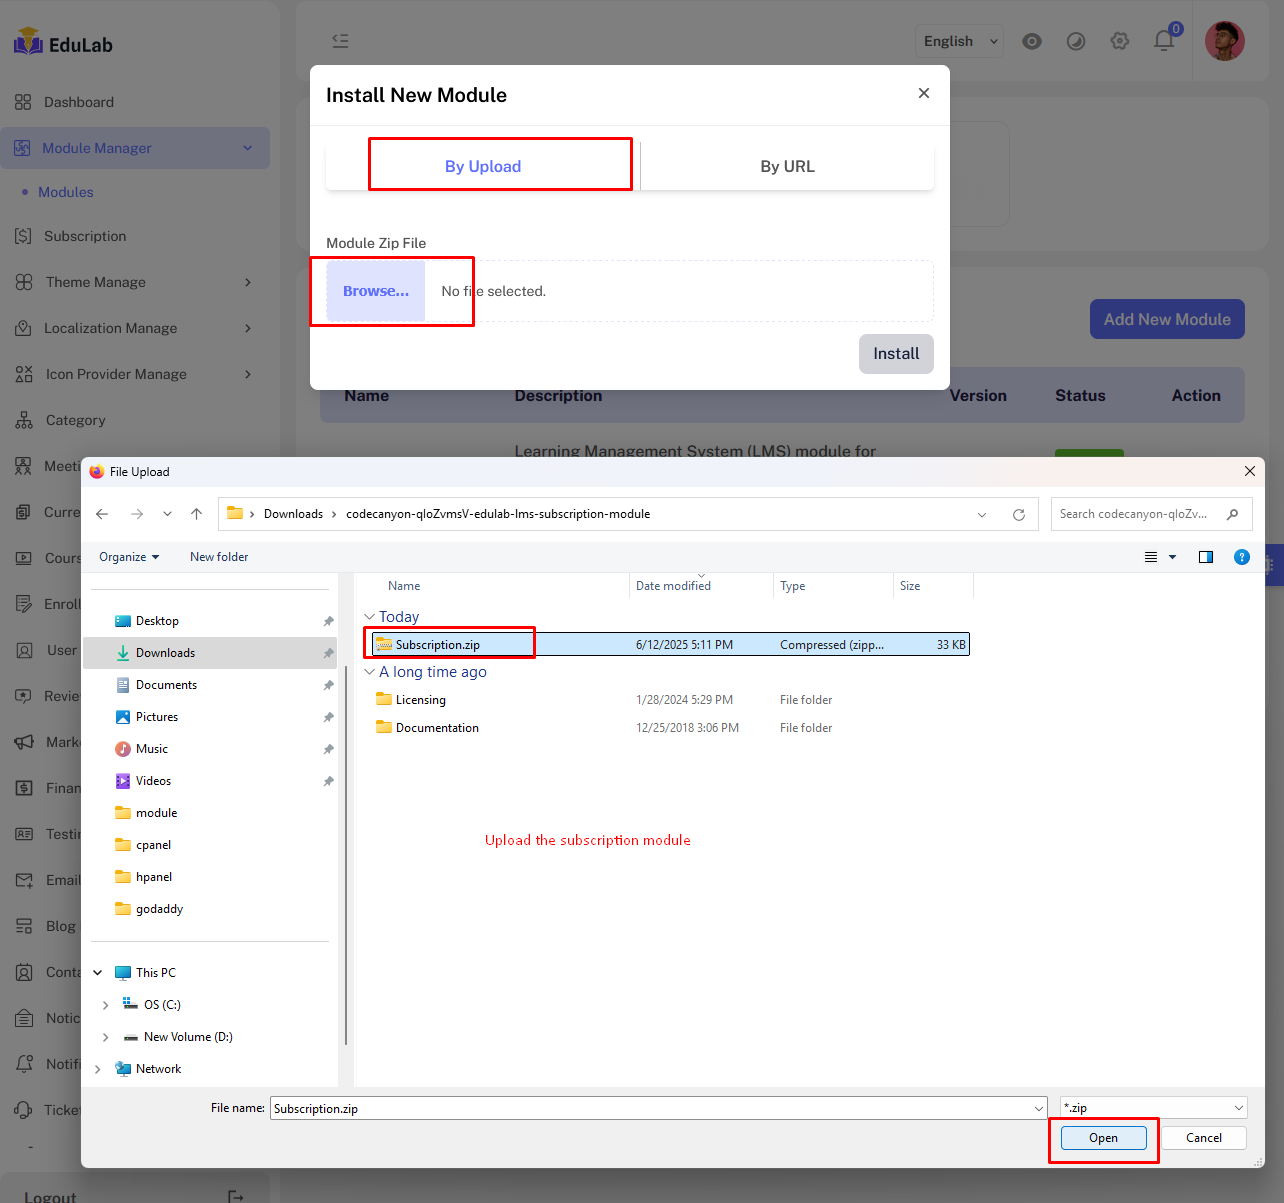
Step 2: Upload the Subscription Module
- Select the
Subscription.zipfile from your computer, or provide the module's URL. - After uploading, click the
Installbutton.
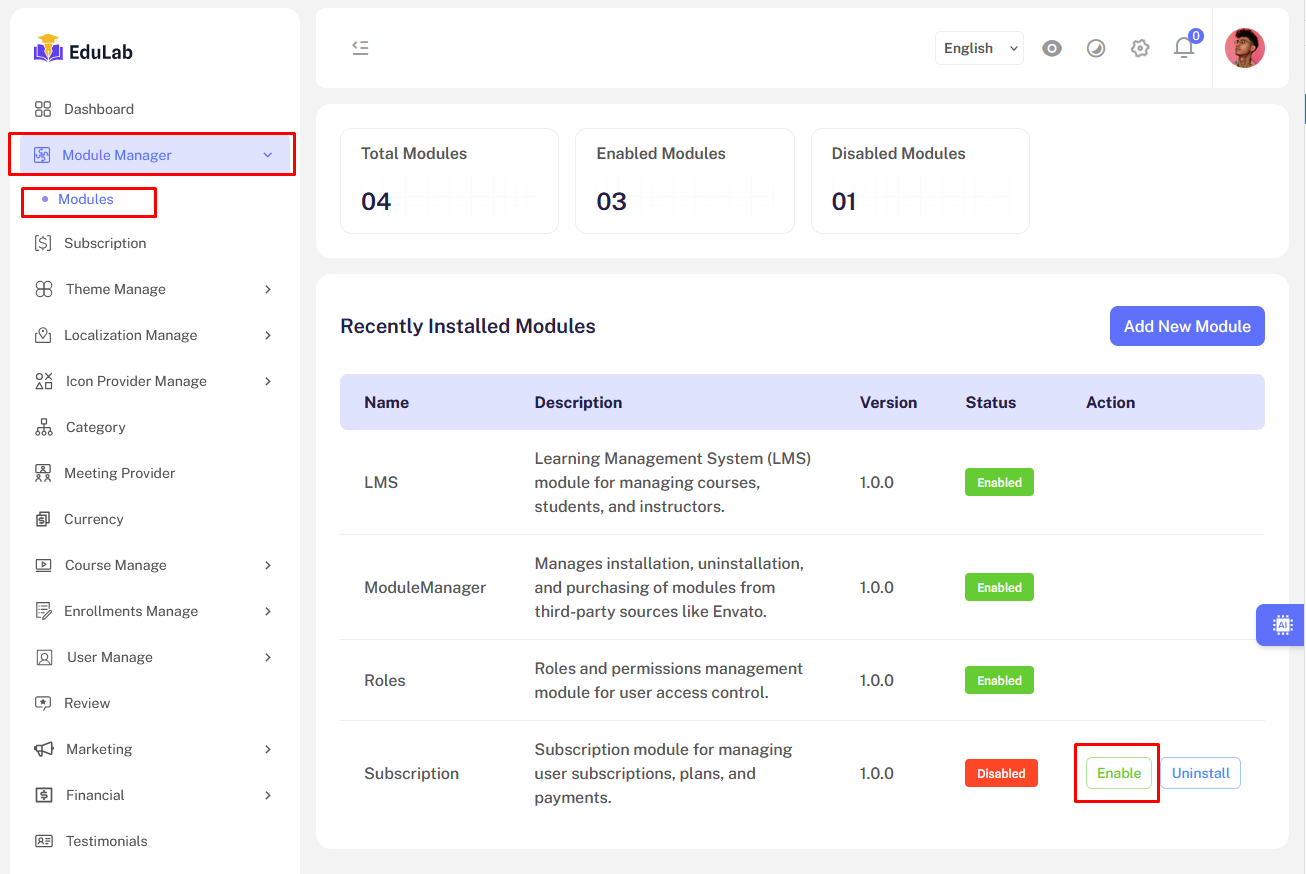
Step 3: Enable the Subscription Feature
After installation, click the Enable button to activate the subscription features.
Note:
The system will update Composer in the background automatically.
If you encounter the errorClass "Modules\Subscription\Providers\SubscriptionServiceProvider" not found, this means Composer has not yet recognized the new module. To resolve this, use one of the following options:
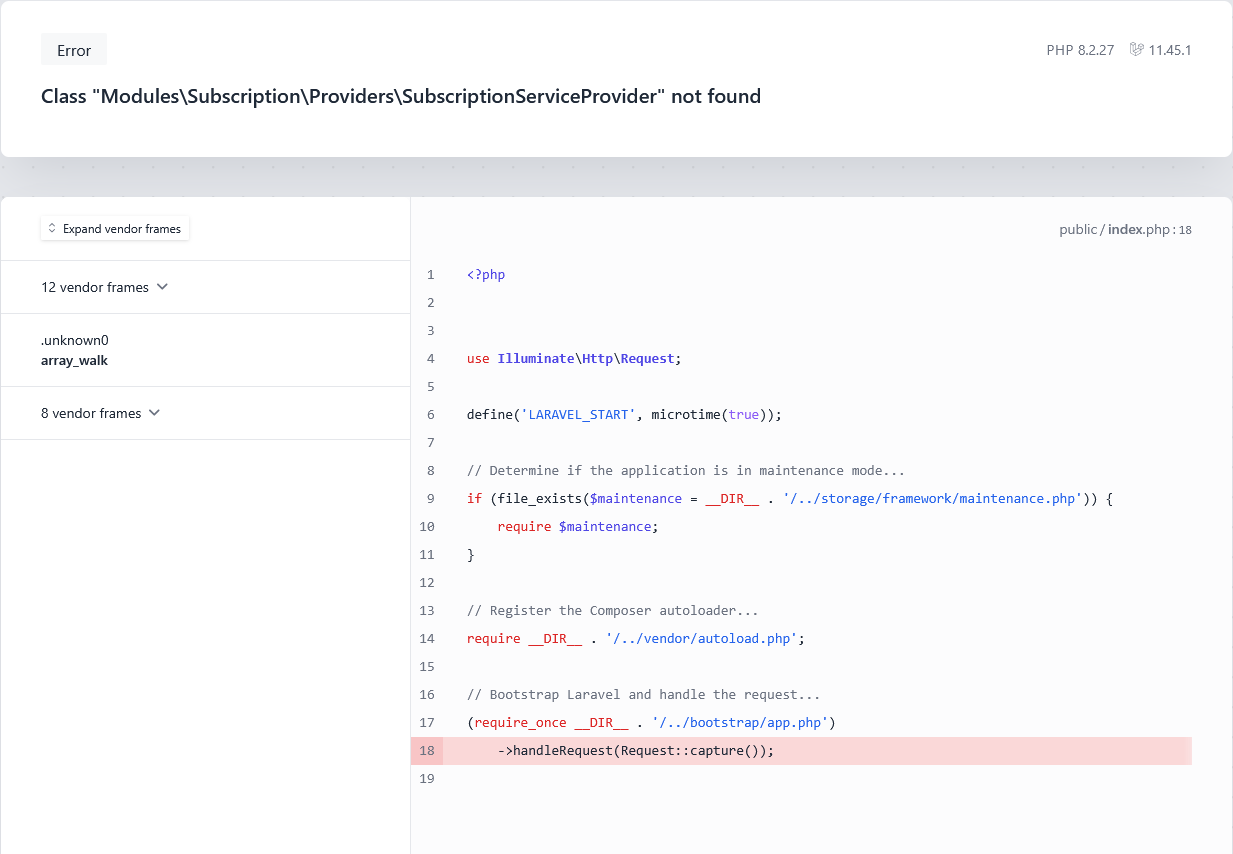
Option 1: Manual Composer Update
Navigate to your project root directory using SSH and run:
composer update
Option 2: Composer Dump Autoload
If composer update is unavailable on your hosting, try:
composer dump-autoload
Note:
If neither command is available, please contact your hosting provider to enable Composer functionality.
Step 4: Temporarily Disable the Subscription Module
To temporarily disable subscription features, click the Disable button.
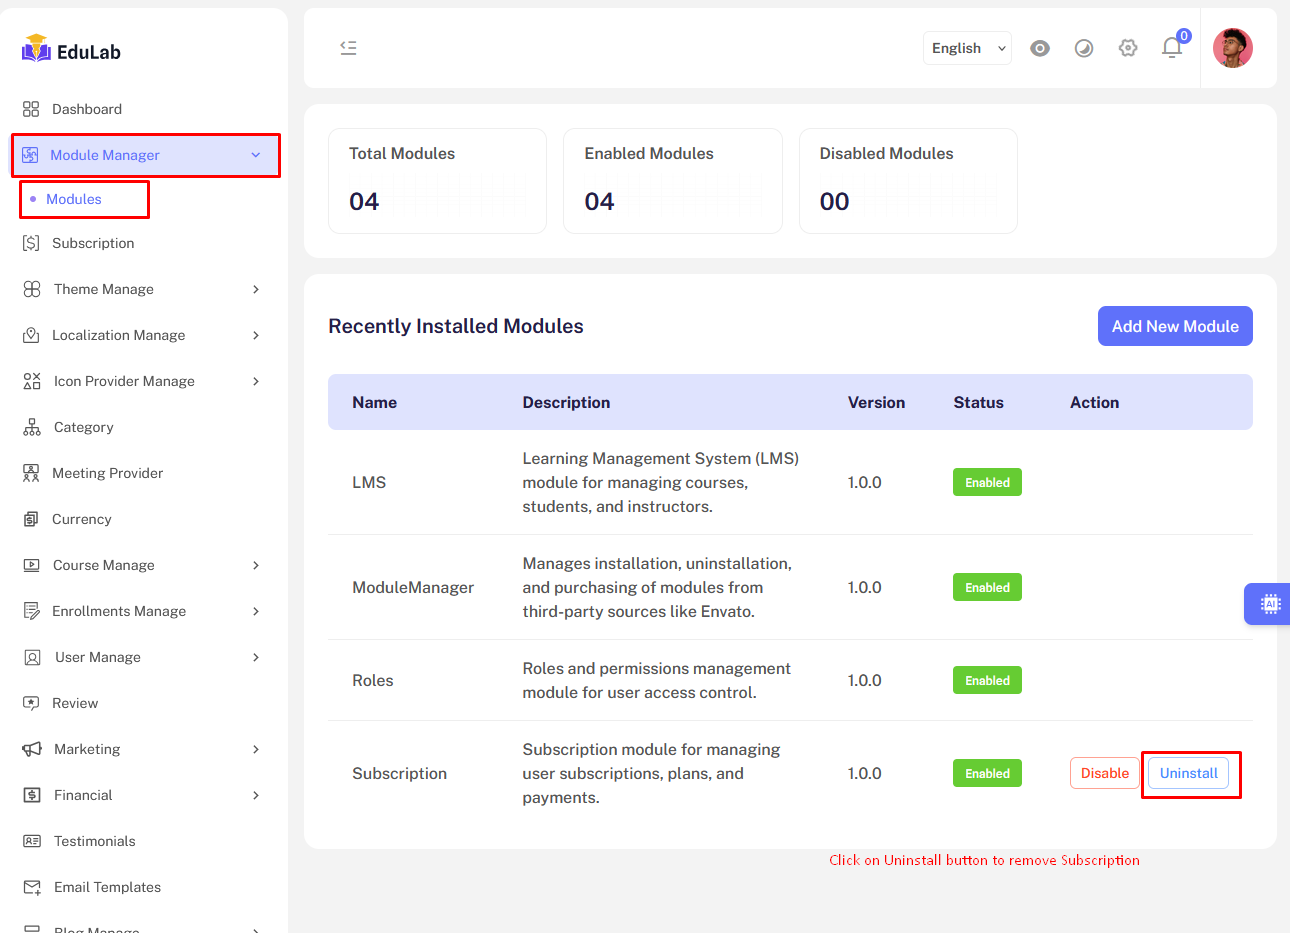
Step 5: Permanently Uninstall the Subscription Module
To entirely remove the subscription feature and clean up related directories and database entries, click the Uninstall button.
Follow these steps to successfully manage your Subscription module. If you need further assistance, please refer to the main documentation or contact support.