Installing the Tenanta Module
Thank you for purchasing the LMS Hub Tenanta module! Follow the steps below to install it into your EduLab LMS.
Before You Begin
Make sure the following are in place:
- EduLab LMS is fully installed and accessible at your domain
- You are logged in as an LMS admin (
/admin) - Your server has a wildcard DNS record (
*.yourdomain.com → your server IP) so tenant subdomains resolve correctly - Composer is available on your server (or via SSH)
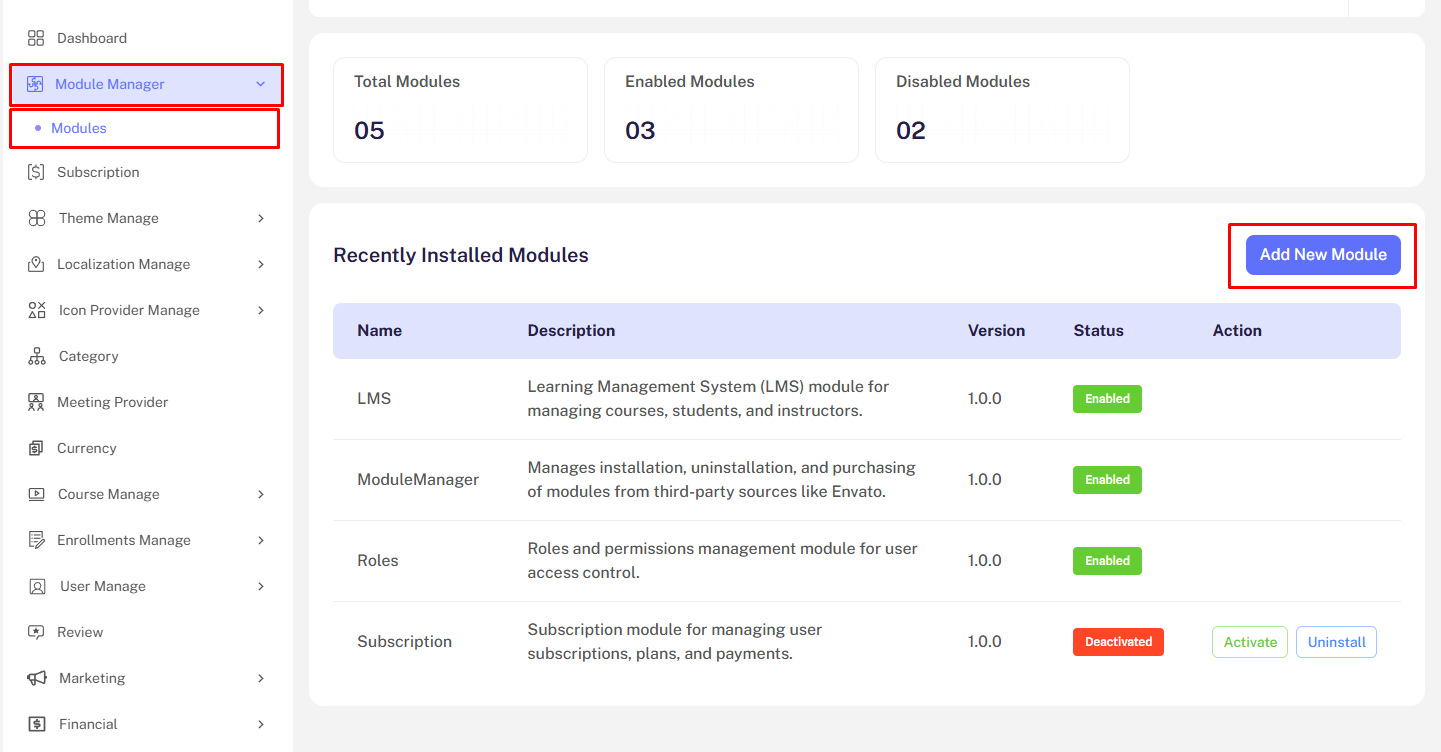
Step 01 — Open Module Manager
In your admin dashboard, navigate to Module Manager → Modules and click the Add New Module button.
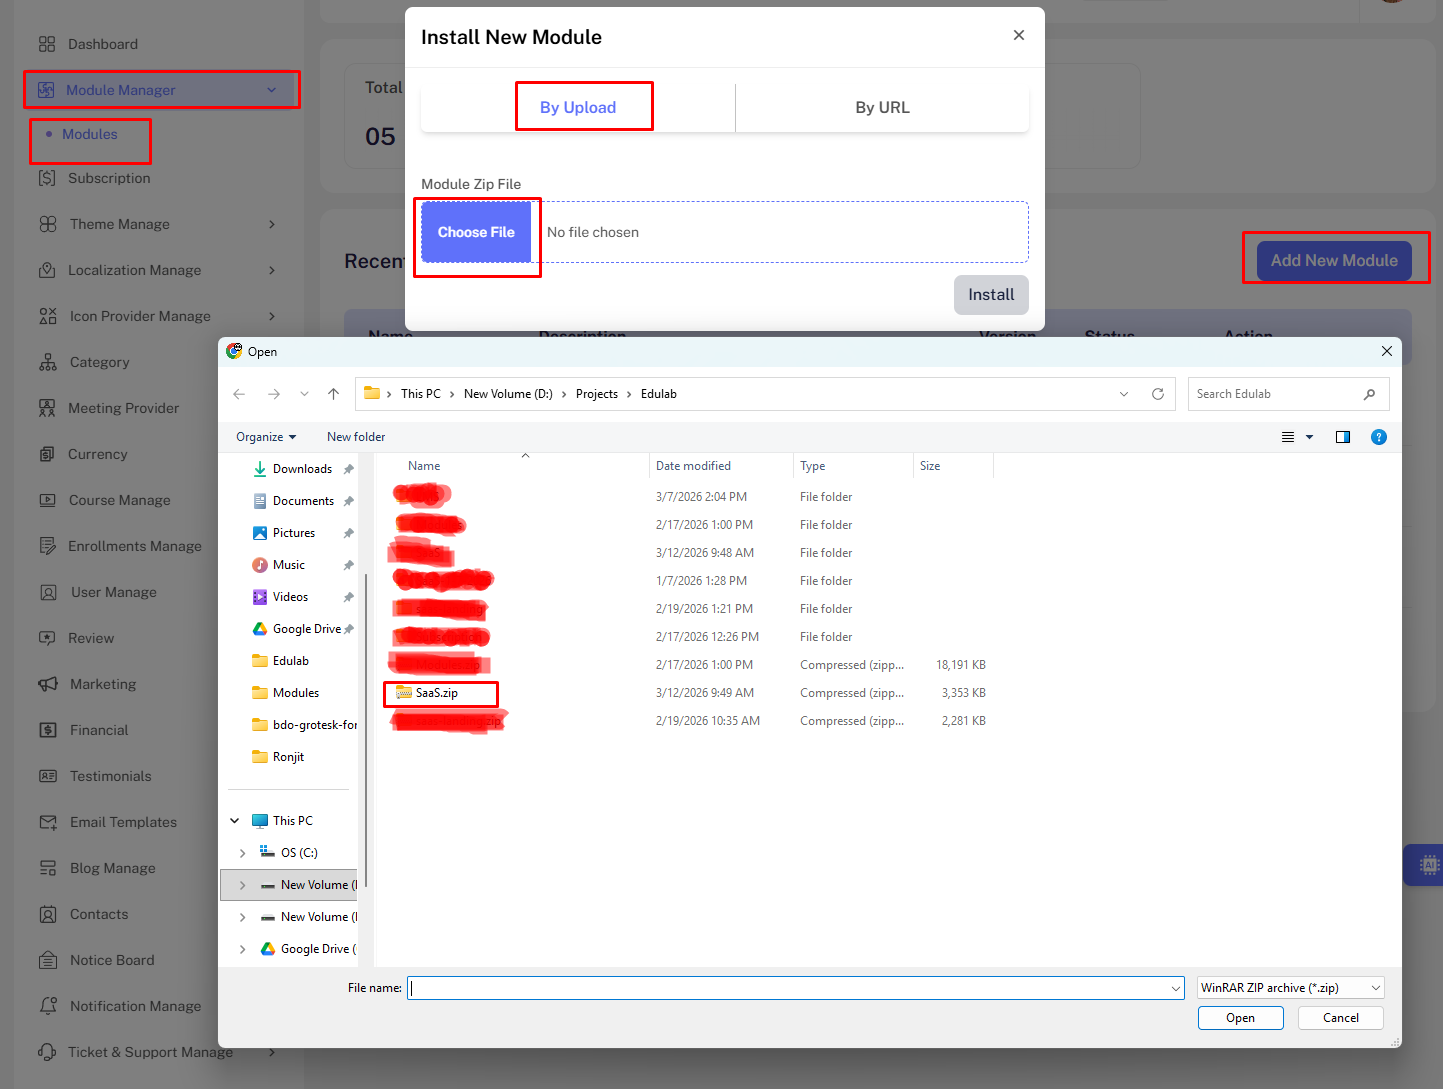
Step 02 — Upload the Tenanta Module
Upload the Tenanta.zip file you downloaded from CodeCanyon, or paste the module URL.
After uploading, click Install.
Step 03 — Run Composer
The Tenanta module adds new PHP dependencies (Stancl Tenancy). The system will attempt to update Composer automatically. If you see the error:
Class "Modules\Tenanta\Providers\TenantaServiceProvider" not found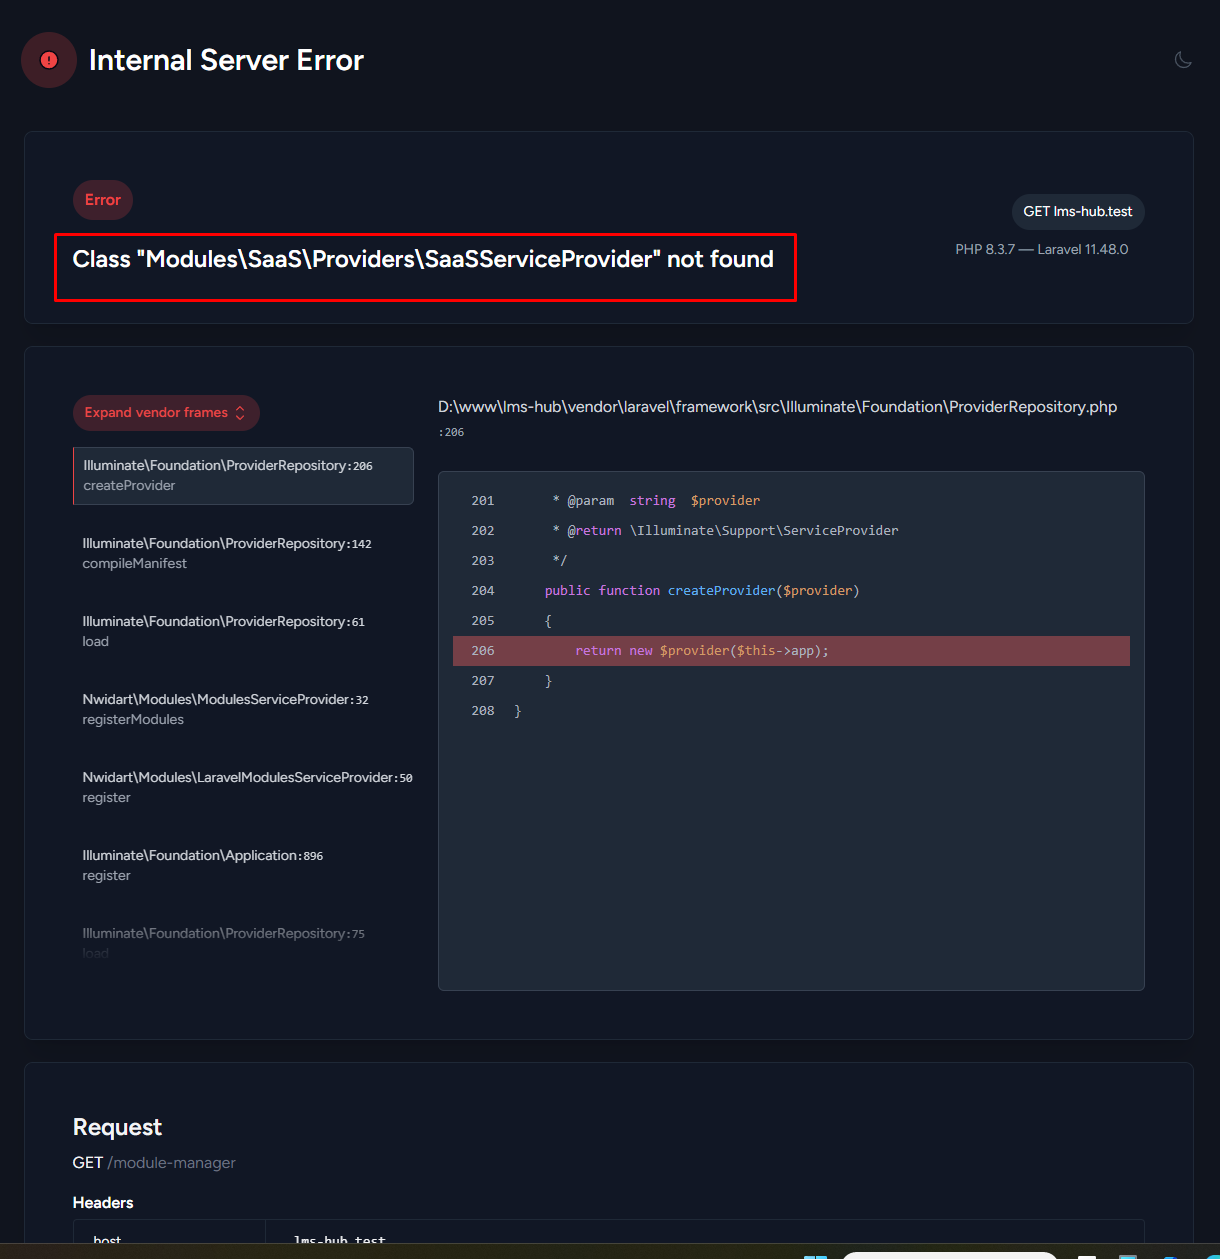
Run one of the following via SSH:
# Preferred
composer dump-autoload

# If you need to resolve new dependencies too
composer update --no-scripts
Step 04 — Activate & Enable the Module
After installation, locate the Tenanta module in the list and click Activate.
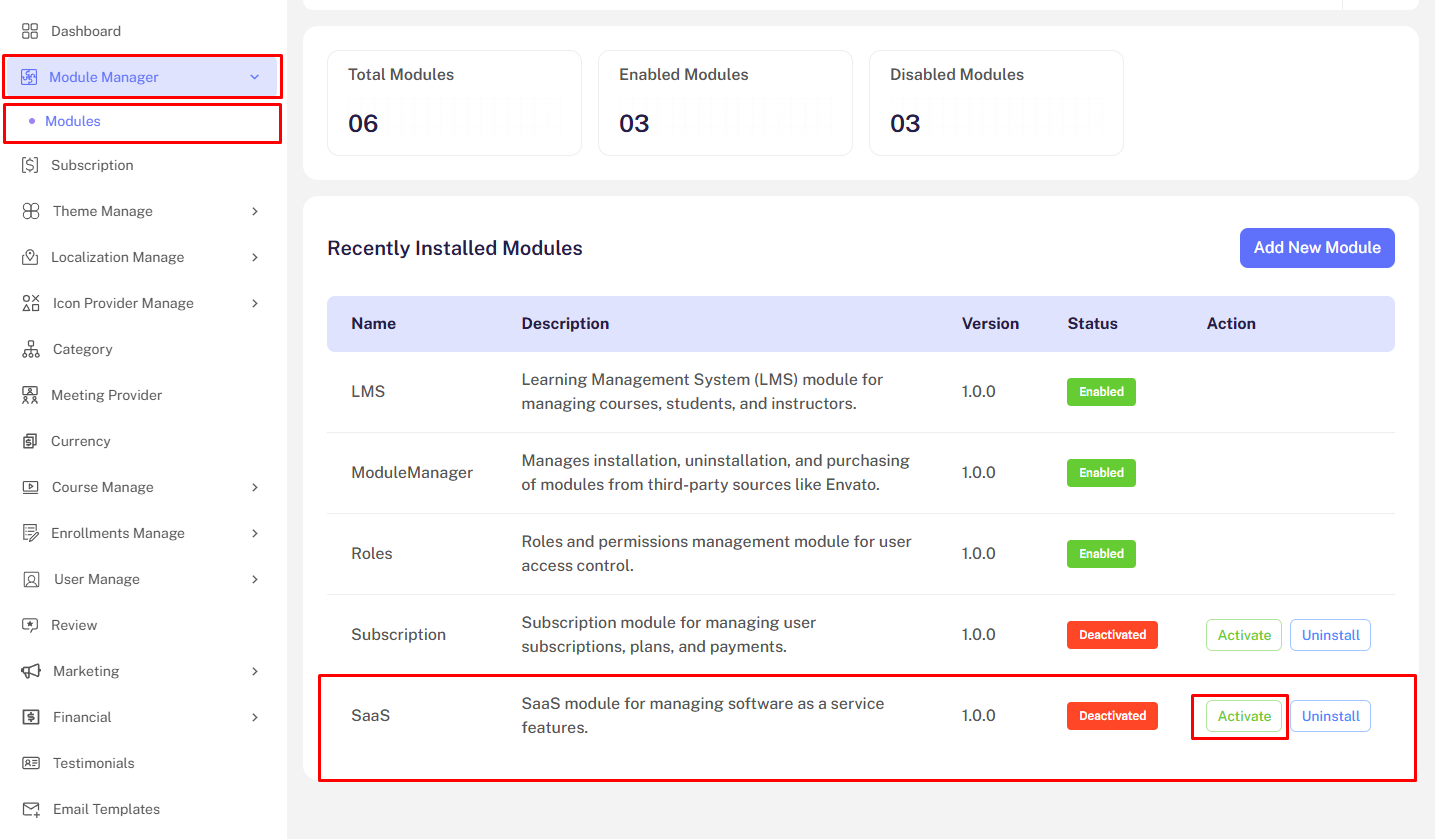

Enabling runs the module's database migrations (creates the tenants, domains, tenant_plans, tenant_billings, tenant_invoices, and tenant_payments tables).
Step 05 — Configure Your Environment
Open your .env file and add the following keys (if not already present):
# The domain used to route central (non-tenant) traffic
CENTRAL_DOMAIN=yourdomain.com

# Tenant provisioning: 'sync' (immediate) or 'queue' (background)
TENANT_PROVISIONING_DRIVER=sync

# Billing defaults
BILLING_CURRENCY=USD
BILLING_CURRENCY_SYMBOL=$
TRIAL_DAYS=14
TRIAL_ENABLED=true
After editing .env, clear the config cache:
php artisan config:clear
php artisan config:cache
Step 06 — Set Up the Cron Job
For trial expiry notifications and subscription auto-renewal to work, add this cron entry on your server:
* * * * * cd /path/to/your/project && php artisan schedule:run >> /dev/null 2>&1In cPanel, go to Cron Jobs and add the entry above.
Note: Without the cron job, subscriptions will not auto-renew and trial expiry emails will not be sent.
Step 07 — Create Your First Plan
Go to Admin → Billing → Plans and create at least one subscription plan before your customers can register.
See Plan Management for full details.
Step 08 — Verify the Landing Page
Visit your domain root (https://yourdomain.com). You should see the Tenanta landing page with your pricing plans listed.
If you see the default LMS homepage instead, check that the Tenanta module is enabled and run:
php artisan route:clear
php artisan route:cache
Disabling the Module
To temporarily disable the Tenanta module without uninstalling it, click Disable in Module Manager.
Uninstalling the Module
To fully remove the module and clean up its database tables, click Uninstall in Module Manager.
Warning: Uninstalling will delete all tenant, billing, and plan data. This is irreversible. Back up your database first.